


Installing Avaya Computer Telephony Server Software
60 Installation Guide
Planning Your Installation
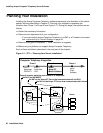
Installing the Avaya Computer Telephony software represents a continuation of the switch-
specific activities described in Chapter 2. Planning your installation represents the
transition from Phase 1 to Phase 2 (see Figure 3-1). During this stage, the activities are as
follows:
● Gather the necessary information
● Determine the requirements of your configuration
- If you are installing Avaya Computer Telephony in a NAT or a Firewall environment,
see
Implementing a Firewall Strategy on page 34
● Determine the type of installation — initial Installation or upgrade
● Make sure your platform can support Avaya Computer Telephony
Each of these activities is described in the next part of this chapter.
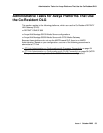
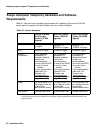
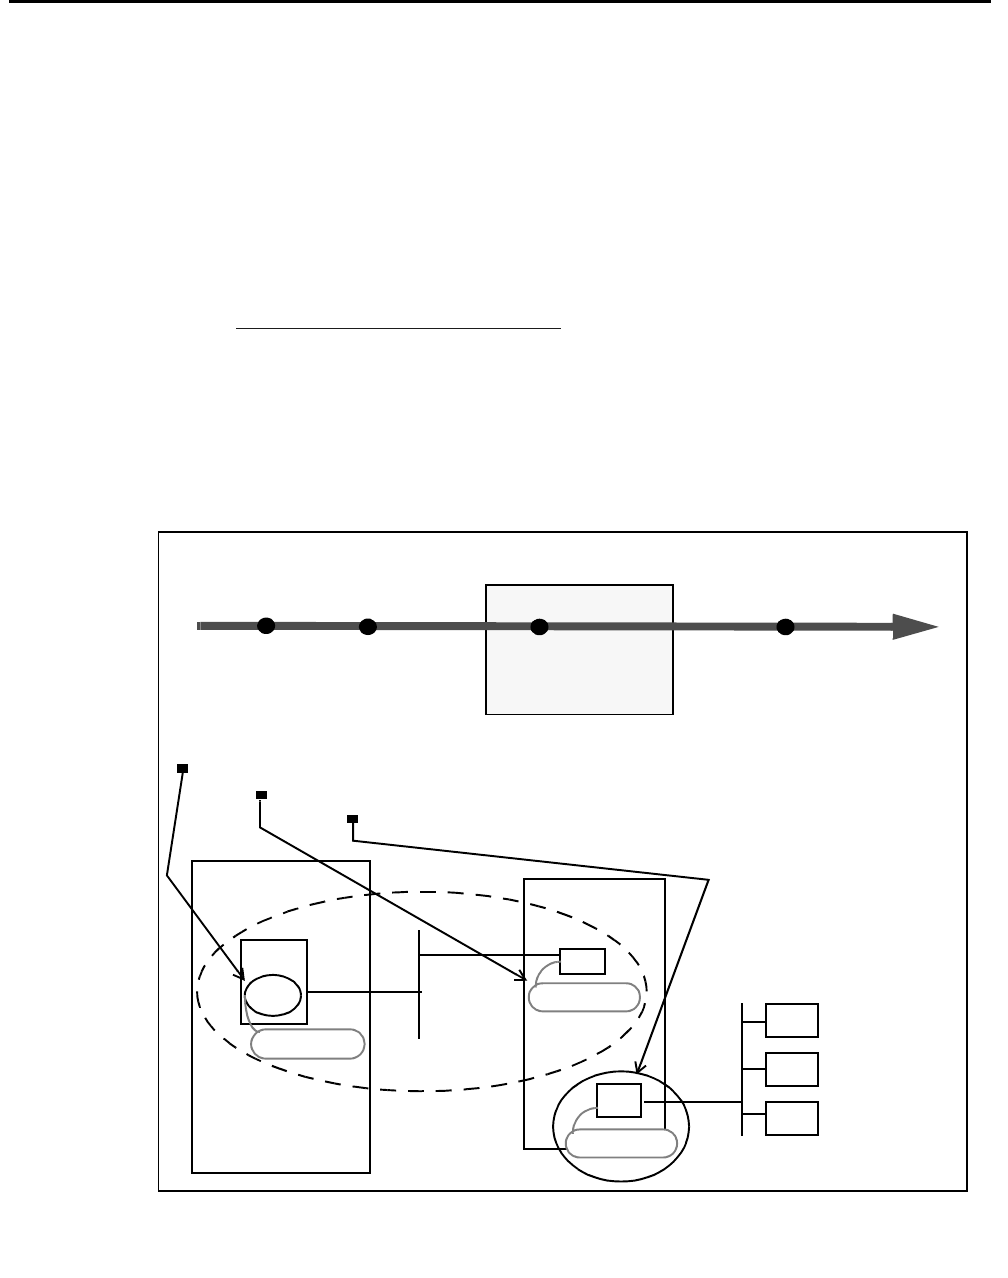
Figure 3-1: “CTI — Planning Your Server Installation”
Administer
DEFINITY
Install
Avaya CT
S
Install
Client
Software
Computer Telephony Integration
Phase 1 Phase 2
Phase 3
NIC
MAPD
DLG
Phase 2 involves gathering host names or IP addresses:
the DLG (on the MAPD)
the NIC on the Avaya CT Server that communicates with the DLG
NIC
TASK 1
192.168.25.20
192.168.25.10
Avaya CT Server
DEFINITY
Administer
DLG
TASK 2
Clients
176.108.25.20
the NIC on the Avaya CT Server that communicates with clients
Server Software