


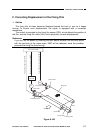
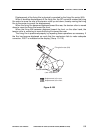
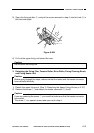
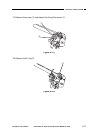

5) Open the fixing shutter t, and put the screw removed in step 4) into the hole y in
the front side plate.
Figure 6-204
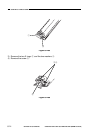
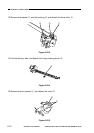
6) Pull out the upper fixing unit toward the rear.
Caution:
Do not touch the fixing film.
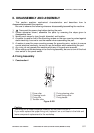
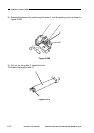
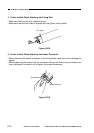
3. Detaching the Fixing Film, Tension Roller, Drive Roller, Fixing Cleaning Brush,
and Fixing Heater Unit
Caution:
Before going through the steps, make sure that the heater and the heater connector
have cooled sufficiently.
1) Detach the upper fixing unit. (See “2. Detaching the Upper Fixing Unit on p. 6-12.”)
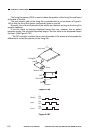
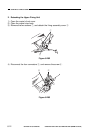
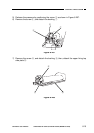
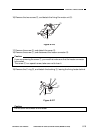
2) Remove the screw q, and detach the heater connector w (front).
Caution:
If you are removing the screw q, you must first make sure that the heater connector
has cooled.
The screw q is a special screw; take care not to drop it.
COPYRIGHT
©
1997 CANON INC. CANON NP6218 REV. 0 MAY 1997 PRINTED IN JAPAN (IMPRIME AU JAPON)
CHAPTER 6 FIXING SYSTEM
6-13
t
y