


NOTE: If for some reason the Auto-Discovery did not complete successfully, there is no way to connect to the
iDRAC remotely. Remote connection would require that you have enabled a non-admin account on the iDRAC. If
there is no enabled account present on the iDRAC, then the only way to access the iDRAC is to login to the box
locally and enabling the account on the iDRAC.
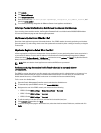
1. Enter the iDRAC IP address into a browser.
2. Log in to the iDRAC Enterprise GUI.
3. In the Integrated Dell Remote Access Controller 6 — Enterprise → Summary tab, in the Virtual Console Preview,
click
Launch.
4. In the Warning — Security dialog, click Yes.
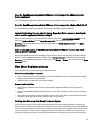
5. In the iDRAC Utility Console, press F12 once or twice to bring up the Authentication Required dialog box.
6. In the Authentication Required dialog box, the name displays, press Enter.
7. Enter your Password.
8. Press Enter.
9. When the Shutdown/Restart dialog box appears, press F11.
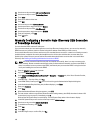
10. The host restarts and the screen shows information about loading memory, then RAID, then when it shows iDRAC
and says to press CTRL + E. Now, immediately press CTRL + E.
If you see this dialog box, your action worked. If not, go to the Power menu and Power Off and Power On again and
repeat this step.
Figure 6. Press CTRL + E to activate this screen.
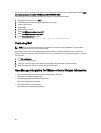
11. In the iDRAC6 Configuration Utility, use the arrow keys to select LAN Parameters.
12. Press Enter.
13. If this host is a blade, to configure NIC, use the space bar to toggle the options to Enabled.
14. If you are using DHCP, use the arrow keys to select Domain Name from DHCP.
15. Use the space bar to toggle the option to On.
16. If you are using DHCP, use the arrow keys to navigate to the IPv4 settings and select DNS Servers from DHCP.
17. Use the spacebar to toggle the option to On.
18. To Exit, on your keyboard, press ESC.
103