


Scanning 345
Procedures for WSD Scan
1
Load the document(s) facing up with top edge in first into the DADF.
OR
Place a single document facing down on the document glass, and close the document cover.
For details about loading a document, see "Loading an Original Document."
2
Press the (
Home
) button.
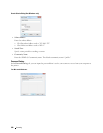
3
Select
Scan Menu
.
4
Select
WSD Scan
.
5
Select until the desired computer you want to send the scan job to appears, and then select that computer.
6
Select
Event
, and specify the type of scan. For details, see "WSD Scan."
7
Press the (
Start
) button to begin sending the scanned file.
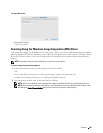
Scanning Using the TWAIN Driver
Your printer supports the TWAIN driver for scanning images that supports Microsoft Windows XP, Windows
Server
®
2003, Windows Vista, Windows Server 2008, Windows Server 2008 R2, Windows 7, Windows 8, Windows
Server 2012, Apple Mac OS X 10.3.9, Mac OS X 10.4.11, Mac OS X 10.5, Mac OS X 10.6, Mac OS X 10.7, Mac OS X
10.8 works with various scanners.
1
Load the document(s) facing up with top edge in first into the DADF.
OR
Place a single document facing down on the document glass, and close the document cover.
For details about loading a document, see "Loading an Original Document."
2
Start the drawing software that supports TWAIN, such as
PaperPort
for Windows. For using other than
PaperPort
,
proceed to step 6.
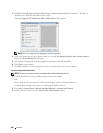
3
To set the location where to store the scanned images:
Click
Desktop
→
Folders
.
In the
Folders
panel, specify a destination folder.
4
To set the scanner:
Click
Desktop
→
Scan Settings
→
Select...
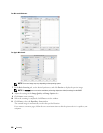
In the
Available Scanners
dialog box, select
TWAIN: Dell C3765dnf Color MFP
, and then click
OK
.
5
Make sure that
Display scanner dialog box
check box is selected on the
Scan or Get Photo
panel.
6
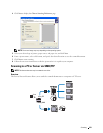
Click
Scan
to begin scanning process.
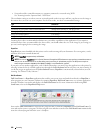
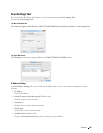
The
Dell C3765dnf Color MFP
TWAIN Driver
window appears.