


416 Printing Using ColorTrack (External Authentication)
8
Turn off the printer, and turn it on again to apply the settings.
IP Address / Host Name & Port
Specify the IP address or host name, and the port address. The change becomes effective after the printer is turned
off and then on again.
CAUTION: Do not use the same port address as that of another port.
NOTE: The port address must be 88 or between 5,000 and 65,535. The default value is 88.
NOTE: Specify the IP address in the nnn.nnn.nnn.nnn format for IPv4. Each section of "nnn" is a variable value between 0 and
255.
NOTE: Specify the IP address in the xxxx:xxxx:xxxx:xxxx:xxxx:xxxx:xxxx:xxxx format for IPv6. Each section of "xxxx" is a
hexadecimal variable value.
Domain Name
Specify the domain name of the Active Directory
®
in Domain Name (Realm Name). The change becomes effective
after the printer is turned off and then on again.
NOTE: Specify the domain name with uppercase characters. Depending on your server, an error may occur if you specify the
domain name with lowercase characters.
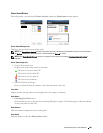
LDAP Server
Specify the directory server and the authentication method to execute LDAP authentication or to acquire
information using LDAP, and specify the range and attributes for searching.
NOTE: When using LDAPS or certificate verification, you must set the LDAP server or import an external certificate. For more
information, see "Using Digital Certificates."
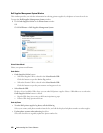
When Using the Dell Printer Configuration Web Tool
1
Launch
Dell Printer Configuration Web Tool
.
a
Open the web browser.
b
Enter the IP address of your printer in the web browser.
See "Dell™ Printer Configuration Web Tool.
"
2
Select
Print Server Settings
.
3
Click the
Security
tab.
4
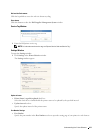
Select
LDAP Server
.
Server Information (for ColorTrack PRO)
:
• Enter the IP address or the host name, and the port address in
IP Address / Host Name & Port
.
• Confirm the software information for
LDAP Server
.
Optional Information (for ColorTrack PRO)
:
• Enter a text string in
Search Directory Root
.
• Enter the login name in
Login Name
.
• Enter the password in
Password
. Then, re-enter the password to confirm the password that you entered.
• Specify the time-out period for
Search Time-Out.
5
Click
Apply New settings
.
6
Turn off the printer, and turn it on again to apply the settings.