


Scanning 367
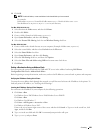
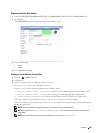
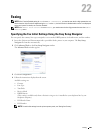
Registering a New E-Mail Address
1
From the
Dell Printer Configuration Web Tool
, click
Address Book
, and then click the
E-Mail Address
tab.
2
Click
Create
.
The
E-Mail Address
page for registering a new e-mail address appears.
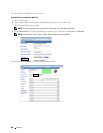
3
Enter the following:
•Name
•Address
4
Click
Apply New Settings
.
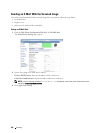
Sending an E-mail With the Scanned File
1
Press the
(Home)
button.
2
Select
Email
.
3
Specify a recipient from the following, and then select
OK
:
New Recipient
: Enter an e-mail address directly.
Address Book
: Select from the following types of address books:
•
Machine Address Book - Individuals
: Select an e-mail address registered in the address book.
•
Machine Address Book - Groups
: Select a group of e-mails registered in the address book.
•
Search Network Address Book
: Search an e-mail address from the LDAP server address book.
Select the recipient you specified from the
New Recipient
to remove or edit the recipient.
Select the recipient you specified from the
Address Book
to remove or see details of the recipient. You can also
change the email to Bcc.
NOTE: For more information on address book and server address book, see "Address Books."
NOTE: For details about Search Network Address Book, see "Using the Server Address Book and Server
Phone Book."
NOTE: The e-mail addresses needs to be registered before you can select Address Book.