


8-14 Dell Precision 210 Desktop Systems User’s Guide
correct settings. See Chapter 3, “Using the System Setup Program,” for
instructions.
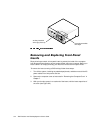
2. Remove the computer cover according to the instructions in “Removing the
Computer Cover” in Chapter 7.
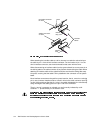
3. To access the battery on the system board, rotate the power supply as described
in “Rotating the Power Supply Away From the System Board” in Chapter 7.
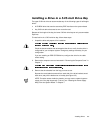
NOTE: If a CD-ROM drive or hard-disk drive in the upper 5.25-inch drive bay
obstructs your access to the battery, you may find it helpful to slide the drive for-
ward slightly to provide more room for you to work. See the section in Chapter 9
titled “Installing a Drive in a 5.25-Inch Drive Bay” for instructions.
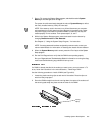
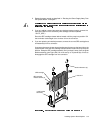
4. Locate the battery and remove it.
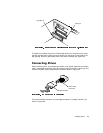
The battery is mounted in a socket labeled “BATTERY” at the upper front-right
corner of the system board (as you face the side of the system) (see Figure 8-1).
Pry the battery out of its socket with your fingers or with a blunt, nonconductive
object, such as a plastic screwdriver (see Figure 8-9).
5. Install the new battery.
Orient the battery with the side labeled “+” facing up. Then insert the battery
into the socket, and snap it into place.
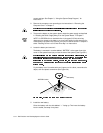
BATTERY socket
battery