


9-12 Dell Precision 210 Desktop Systems User’s Guide
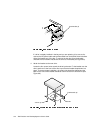
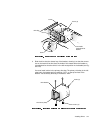
5. Align the four screw holes of the drive and bracket. Insert and tighten the screws
that came with your upgrade kit.
Use the four screw holes in the top and bottom of the bracket (see Figure 9-10) to
secure the installed hard-disk drive(s).
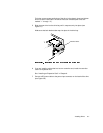
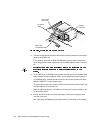
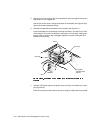
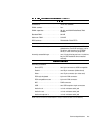
6. Reinstall the hard-disk drive bracket into the chassis (see Figure 9-11).
Insert the bracket into the chassis by inserting the hooks in the slots on the front
of the chassis. Then lower the bracket to the bottom of the chassis, making sure
that the latch on the drive bay is engaged. Replace the screw holding the drive
bracket to the drive bay.
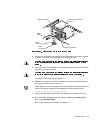
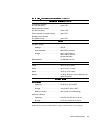
7. Connect a DC power cable to the power input connector on the back of the drive
(see Figure 9-12).
Check all connectors to be certain that they are properly cabled and firmly seated.
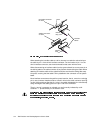
hooks (3)
removable
hard-disk drive
bracket
latch
screw
drive bay