


5-4 Dell Precision 210 Desktop Systems User’s Guide
&RQILJXULQJWKH 1,&
This section provides instructions for configuring the computer’s integrated,
10/100-megabits-per-second (Mbps) 3Com NIC under the following operating
systems:
Microsoft Windows NT 4.0
Microsoft Windows 95
Microsoft Windows 98
NOTE: If you reinstall Windows NT 4.0, you must install Service Pack 3 and the
bus-mastering EIDE device driver before you can install the NIC drivers.
:LQGRZV171,&'ULYHU
The Windows NT 4.0 operating system automatically detects and installs the NIC
driver. To reinstall the driver, complete the following steps:
1. Use the Program Diskette Maker (located in the Dell Accessories program folder)
to make a diskette copy of the NIC drivers installed on your hard-disk drive.
2. Connect the network cable to the back of your computer.
See “Network Cable Requirements” found earlier in this chapter for detailed
instructions.
3. Verify that the NIC is enabled in the System Setup program.
See “NIC” in Chapter 3 for more information.
4. Start the Windows NT operating system, and log in as user Administrator or as a
user with Administrator privileges.
For information on administrative users and privileges, see your Windows NT
documentation.
5. Double-click My Computer, double-click Control Panel, and then double-click the
Network icon.
NOTE: If you are installing networking on your system for the first time, the Win-
dows NT operating system displays a message asking if you want to install
networking. Click
Ye s
, and refer to your Windows NT documentation for
instructions.
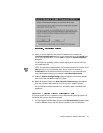
6. Click the Adapters tab in the Network Control Panel, and then click Add to
access the Select Network Adapter window.
7. C l i c k Have Disk. Insert the
NIC driver diskette 2 into drive A, type a:\, and then
click OK.
The Select OEM Option dialog box appears.
8. Select 3Com Fast EtherLink/EtherLink XL PCI Busmaster NIC (3C905B) for
the 10/100-Mbps NIC, and then click OK.