5-8 Dell Precision 210 Desktop Systems User’s Guide
2. Connect the network cable to the back of your computer.
See “Network Cable Requirements” found earlier in this chapter for detailed
instructions.
3. Verify that the integrated NIC is enabled and connected to its network.
See “NIC” in Chapter 3 for more information.
4. Start the Windows 95 operating system.
5. Click the Start button, point to Settings, and click the Control Panel. Then
double-click the System icon.
6. In the System Properties window, click the Device Manager tab.
7. In the list of system devices, double-click Unknown Devices. Then click PCI
Ethernet Controller.
8. Click Properties to access the PCI Ethernet Controller window.
9. Select the Driver tab, and then click Change Driver to access the Select Hard-
ware Type dialog box.
10. Select Network Adapter, and then click OK to access the Select Device
window.
11. Click Have Disk to access the Install From Disk dialog box.
12. Insert the NIC driver diskette 2 into drive A, and click OK.
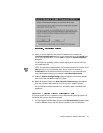
The system reads the files on the diskette and then displays the Select Network
Adapters window.
13. Select 3Com Fast EtherLink XL 10/100Mb Ethernet Adapter, and click OK to
access the PCI Ethernet Controller Properties dialog box.
14. Click OK to access the Network dialog box. Enter your computer name and
workgroup/domain. Then click Close.
15. Click OK in the Insert Disk dialog box.
16. When prompted for the location of additional files, insert the Windows 95 CD
and specify the \win95 directory on your CD-ROM drive. Then click OK to access
the System Properties dialog box, and click OK.
17. Remove the diskette from drive A. Click the Start button, click Shut Down, and
then click Restart the Computer.
18. Click Ye s when prompted to restart the system.


