Setup: Installation
PmT1 and PmE1 User’s Manual 10002367-02
2-4
Connectors
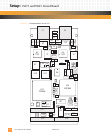
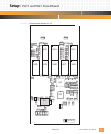
The PmT1 and PmE1 circuit board has various connectors (see the figures beginning on
page 2-2), summarized as follows:
P1/P2: These connectors are installed for the PmT1 front panel I/O configurations. See Chapter 6
for pin assignments.
P3: This is the optional 10-pin BDM JTAG header for viewing processor functions. See
Tab le 3 -7
for pin assignments.
P11/P12: These provide a 32-bit PCI interface between the module and the PMC baseboard. Pin
assignments are shown in Chapter 7.
P14: This is the I/O connector for the EIA-422 and EIA-232 serial ports. See Chapter5 for pin
assignments.
INSTALLATION
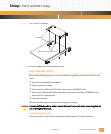
The PmT1 and PmE1 module may be installed in either expansion site on the baseboard. To
attach the module to your baseboard, follow these steps:
1 Remove the loosely installed screws from the standoffs on the PmT1 and PmE1 module.
2 Line up the P11, P12, and P14 connectors and the 5V keying hole with the PMC connectors
and the keying pin on the baseboard. Press the module into place, making sure that the
connectors are firmly mated and the module front panel is fully seated in the baseboard
front panel.
3 From the back of the baseboard, insert and tighten the two screws in the standoffs closest
to the PMC connectors.


