


RESTRICTED USE ONLY Fargo Electronics, Inc.
HDP600 High Definition Card Printer/Encoder User Guide (Rev. 2.5)
7-57
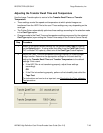
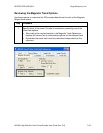
Selecting the Print YMC under the K and Print K Only options
Step Procedure
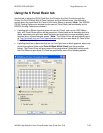
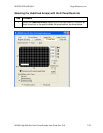
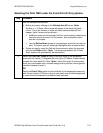
1 Use the Defined Area function.
a. Define an area by clicking on the Defined Area UP arrow. (Note:
Another .2 x .2 (5mm x 5mm) area will appear in the lower left-hand
corner. This is the location in which all newly defined areas will first
appear. Up to 5 areas can be defined.)
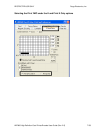
• Additional areas cannot be added until the most recently created area
has been moved or sized. For this reason, size and position each
area as it is created.
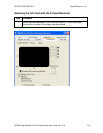
• Use the Defined Area arrows to navigate back and forth from area to
area. The active area will always be highlighted with a dotted outline.
b. Delete an area by using the Defined Area arrows to select the area and
click on the Delete button. (Note: If all areas are deleted, the K Panel
Resin options will automatically be deselected.)
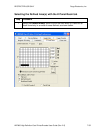
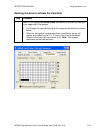
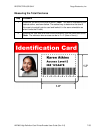
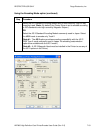
2 Select the Print YMC Under K option to print all black in the designated
areas with the Yellow (Y), Magenta (M) and Cyan (C) Ribbon Panels directly
beneath the resin black (K) Panel. (Note: Select this option if printing resin
black text or barcodes onto a colored background to provide a more gradual
transition between the two.)
OR
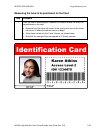
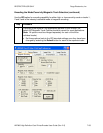
Select the Print K Only option to print all black in the designated areas only
with the resin black (K) Panel or to print resin black onto a white background
to maximize the sharpness of printed text and barcodes.