


109
PRIMERGY TX200 S2 User’s Guide
3
OS Installation Using ServerStart
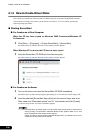
3.5.2 Installation in Guided Mode
Edit the configuration file and perform installation in guided mode.
1 Turn on the server and insert the ServerStart CD-ROM immediately after that.
ServerStart starts up and a message appears prompting you to insert the ServerStart floppy disk.
2 Insert the ServerStart floppy disk copied in the preparatory procedure into the
floppy disk drive and click [Create].
The network setting window for remote installation appears.
3 Click [OK].
The [Initialization of ServerStart core running] window appears and unattended installation will
be started. Depending on the hardware configuration, this process may take a few minutes. When
the process is completed, the [Create a ServerStart Floppy Disk] window appears.
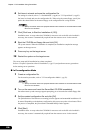
4 Click [or insert a Server Start Floppy Disk to Start Server Start].
The [Welcome to ServerStart] window appears.
5 Click [Click here to prepare and/or initiate an operation system installation].
The [Select the operating system to be installed] window appears.
6 Click [MS Windows Operating Systems].
The [Microsoft Windows Operating System Installation] window appears.
7 Click the OS to install.
8 Click [Prepare & initiate an unattended installation of (OS)].
The guided mode starts.
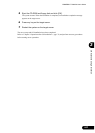
9 Click [Start here to create a complete configuration file].
The [Open ServerStart Configuration File] window appears.
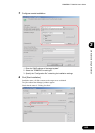
10 Specify "SerStartBatch.ini" on drive A and click [Create].
The display returns to the guided mode window.
For procedures from setting wizards to completion of installation, refer to "3.1 Guided Mode"
(
pg.60).
When performing remote installation, refer to "3.4 Remote Installation" (
pg.90).