


Motor
1 Remove the Printer Covers.
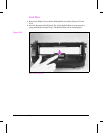
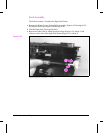
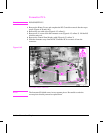
2 Remove the motor connector (Figure 6-38, callout 1).
3 Remove the memory door guide to expose the two motor screws.
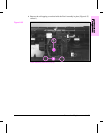
4 Remove the motor screws (Figure 6-38, callout 2).
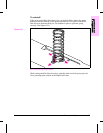
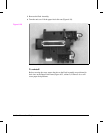
5 Lift the Motor out.
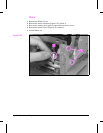
Motor Removal
Figure 6-38
6 - 42 Removal and Replacement