


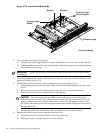
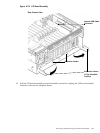
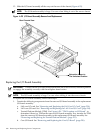
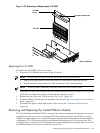
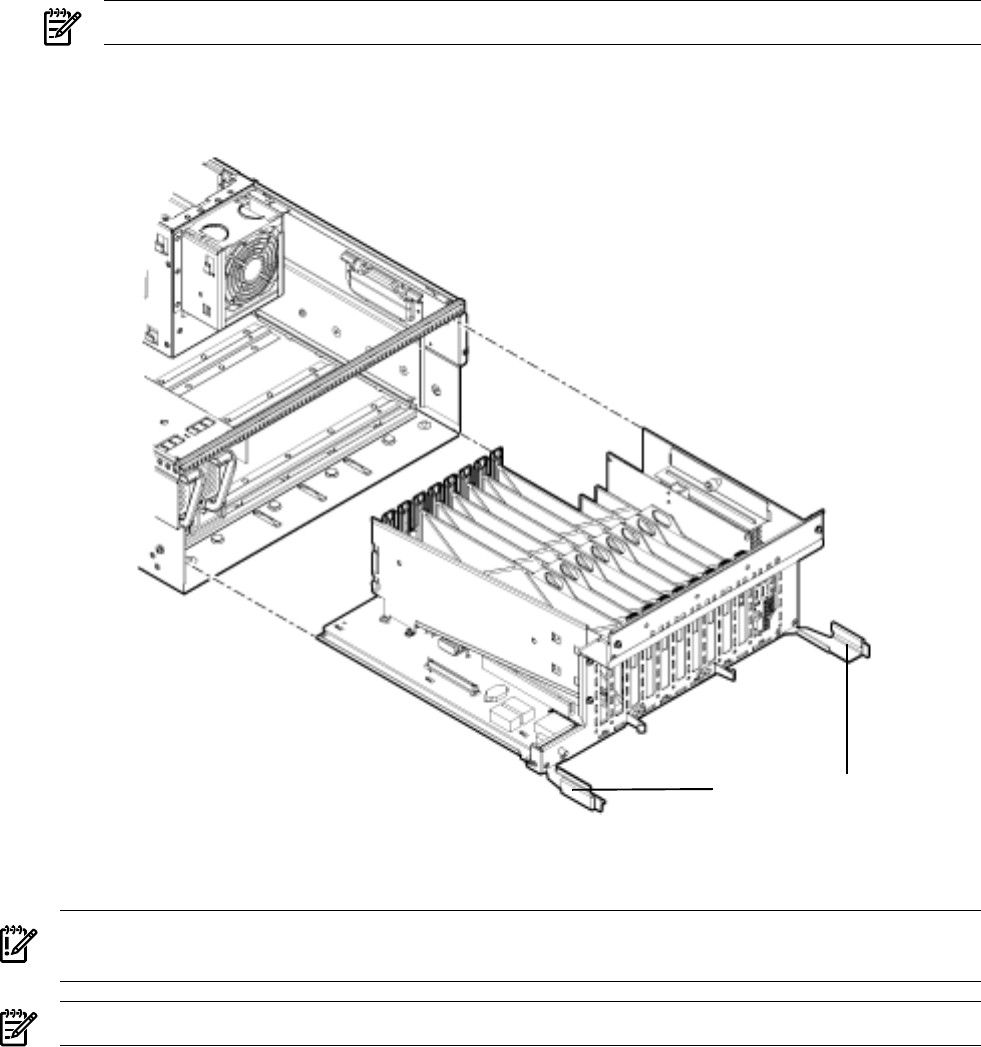
13. Slide the I/O board assembly all the way out the rear of the chassis (Figure 6-25).
NOTE: The I/O board assembly is large. Use care when lifting it out of the server chassis.
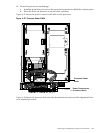
Figure 6-25 I/O Board Assembly Removal and Replacement
Rear Chassis View
Extraction Levers In
The Unlocked Position
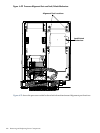
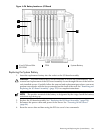
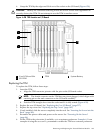
Replacing the I/O Board Assembly
IMPORTANT: Ensure that the I/O board extraction handles are in the outward, unlocked position
to engage the assembly correctly with the midplane board socket.
NOTE: The I/O board assembly is large. Use care when sliding it into the server chassis.
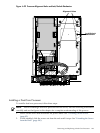
To replace the I/O board assembly, follow these steps:
1. Transfer the following components from the removed I/O board assembly to the replacement
I/O board assembly:
a. SAS core I/O card. See “Removing and Replacing the SAS Core I/O Card” (page 239).
b. LAN core I/O card. See “Removing and Replacing the LAN Core I/O Card” (page 241).
c. Trusted Platform Module (TPM). Use Figure 6-28: “TPM Location on I/O Board”, to
determine if there is a TPM on the removed I/O board assembly. If so, transfer the TPM
from the removed I/O board assembly to the replacement I/O board assembly. See
“Removing and Replacing the Trusted Platform Module” (page 233).
d. Core I/O board. See “Removing and Replacing the Core I/O Board” (page 236).
228 Removing and Replacing Server Components