


12-14 MAX 6000/3000 Network Configuration Guide
Configuring IPX Routing
Configuring IPX routing connections
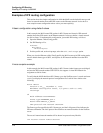
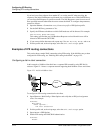
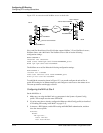
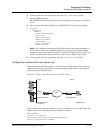
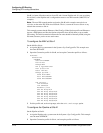
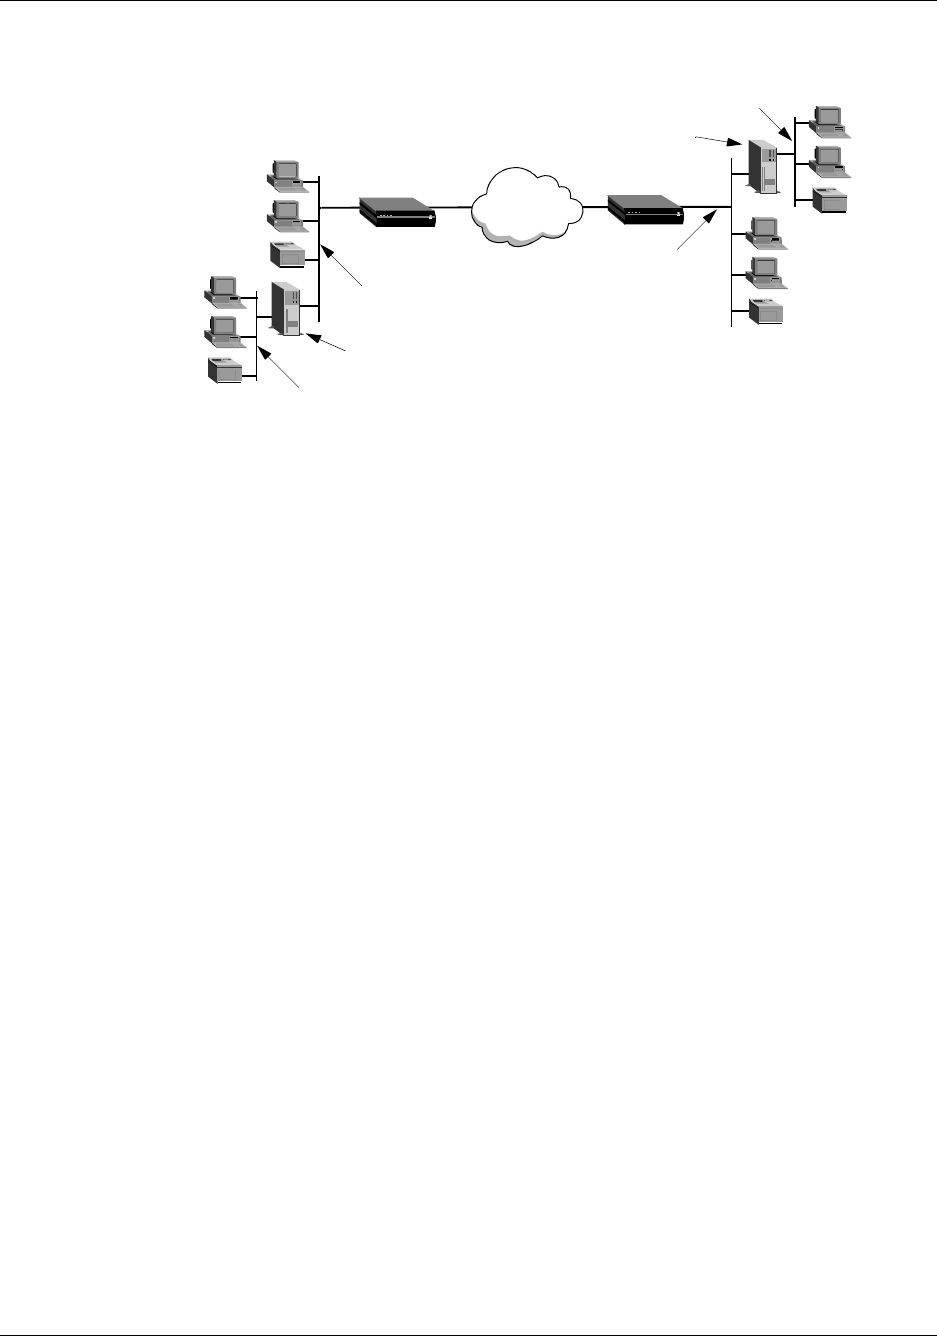
Figure 12-2. A connection with NetWare servers on both sides
Site A and Site B each have Novell LANs that support NetWare 3.12 and NetWare 4 servers,
NetWare clients, and a MAX unit. The NetWare server at Site A has the following
configuration settings
:
Name=SERVER-1
internal net CFC12345
Load 3c509 name=ipx-card frame=ETHERNET_8023
Bind ipx ipx-card net=1234ABCD
The NetWare server at Site B has the following configuration settings:
Name=SERVER-2
internal net 013DE888
Load 3c509 name=net-card frame=ETHERNET_8023
Bind ipx net-card net=9999ABFF
To establish the connection shown in Figure 12-2, you would configure the unit at Site A,
enable IPX routing for its Ethernet interface, and configure a static route to the remote server.
The same procedures would apply to Site B.
Configuring the MAX at Site A
On the MAX Site A:
1 Make sure you assign the MAX unit a system name in the System > System Config
profile. This example uses the name SITEAGW.
2 If you have not done so already, configure the Ethernet > Mod Config profile (as described
in “Enabling IPX routing in the MAX” on page 12-5).
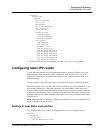
3 In Answer > PPP Options, enable IPX routing and PAP/CHAP authentication, and then
close the Answer profile.
Ethernet
Answer
PPP options...
Route IPX=Yes
Recv Auth=Either
Site B
Site A
Net=9999ABFF
Net=1234ABCD
Net=AABBCC11
Net=11223344
Internal net=CFC12345
Internal Net=013DE888
WAN
SITEAGW
MAX
SITEBGW
MAX