Maintenance/replacement
100 - ENGLISH
Maintenance
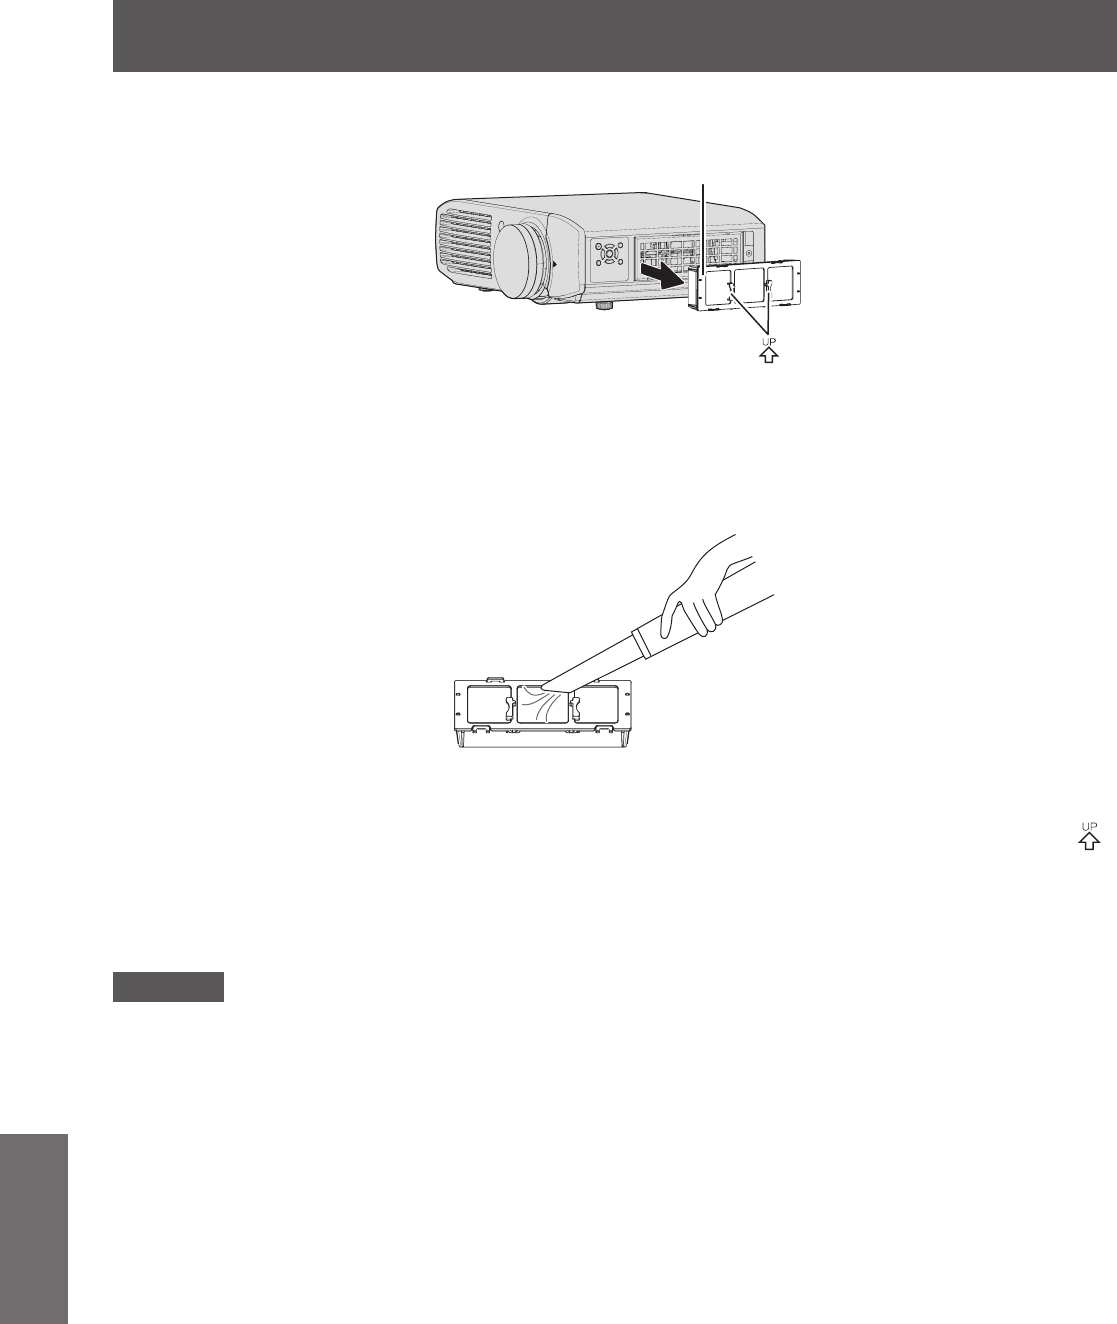
2) Pull out the air lter unit.
z
Hold the grips on the air lter unit and pull out the air lter unit from the projector.
Air filter unit
Grips (arrow engraved)
• After removing the air lter unit, remove any large build ups of dirt or dust in the air lter unit bay and the
air intake port on the projector.
3) Clean the air lter unit.
z
Vacuum dirt and dust from the air lter unit.
4) Attach the air lter unit to the projector.
z
Perform Step 2) in the reverse order.
• Insert the air lter unit into the projector in the direction of the arrow engraved into the air lter frame (
)
until it clicks into place.
5) Attach the air lter cover to the projector and use a Phillips screwdriver to tighten
the air lter cover xing screw (one screw).
z
Perform Step 1) in the reverse order.
Attention
z
Make sure that the air lter is properly attached before using the projector. If it is not properly attached, the
projector will suck in dirt and dust causing a malfunction.
z
Do not use water to wash the air lter unit. Doing so decreases its ability to absorb dust.


