


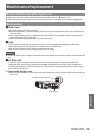


Maintenance/replacement
ENGLISH - 105
Maintenance
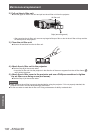
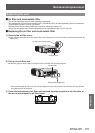
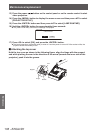
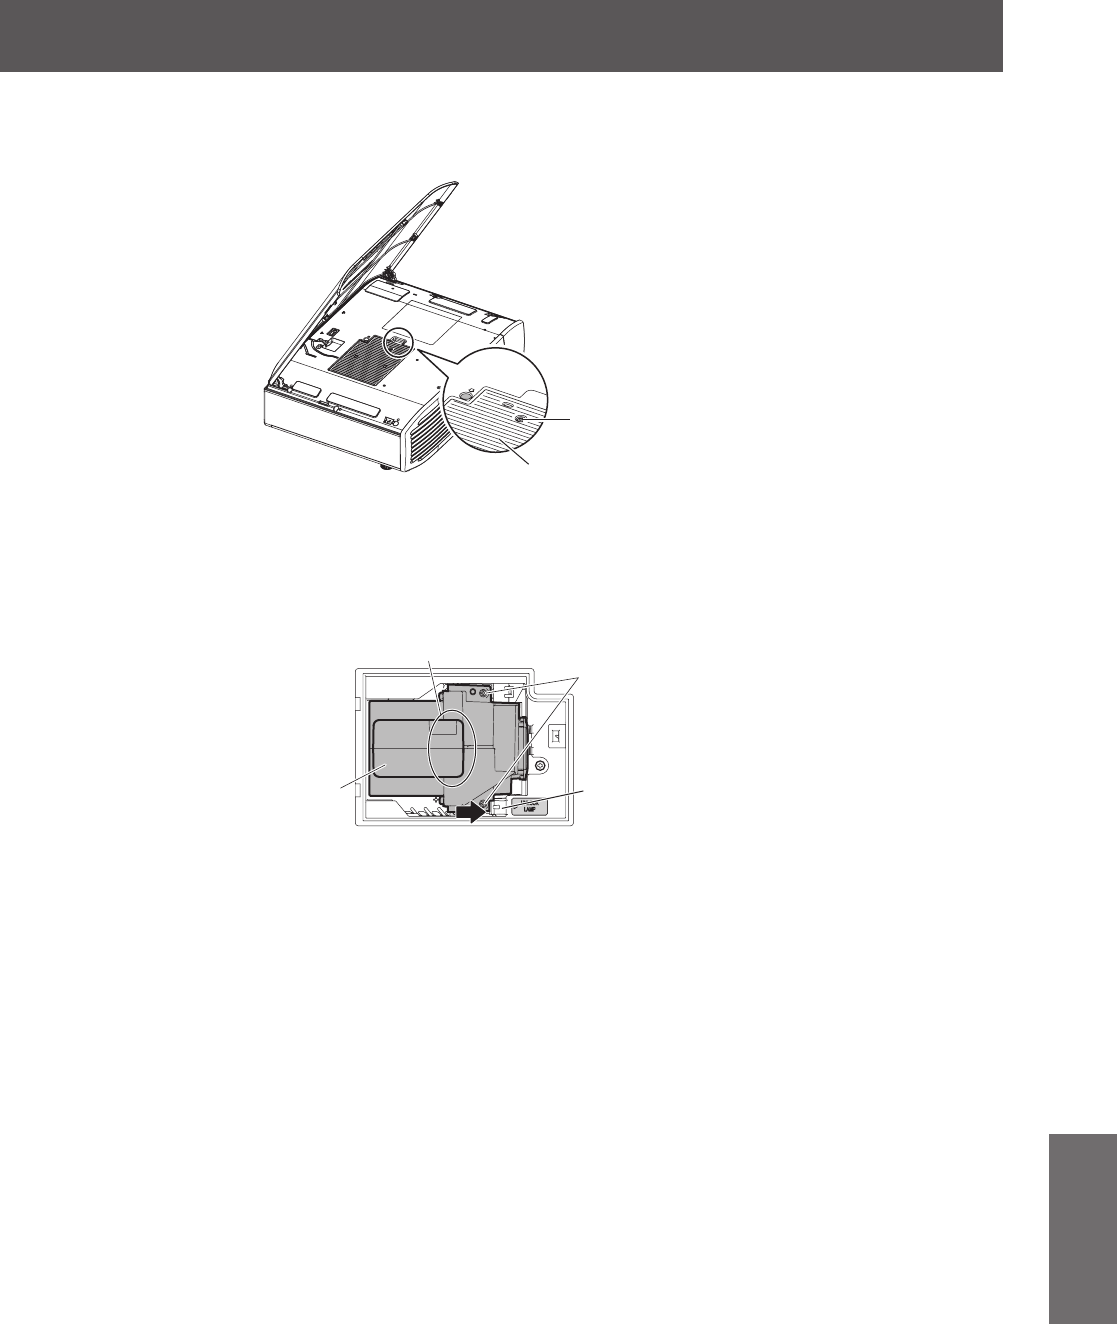
4) Use a Phillips screwdriver to turn the lamp cover xing screw (one screw) until it
turns freely, and then remove the lamp cover.
z
Slowly remove the lamp cover from the projector.
Lamp cover fixing
screw
Lamp cover
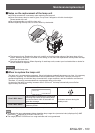
5) Use a Phillips screwdriver to turn the lamp unit xing screws (two screws) until it
turns freely.
6) Hold the handle of the lamp unit and with the lamp unit lock held in the direction of
the arrow, carefully pull it out of the projector unit in a vertical motion.
A
Handle
Lamp unit fixing screws
Lamp unit lock
7) Insert the new lamp unit while making sure that the direction is correct and use a
Phillips screwdriver to tighten the lamp unit screws (two screws).
z
Press down on the A part rmly when inserting the lamp unit.
8) Attach the lamp cover and use a Phillips screwdriver to tighten the lamp cover xing
screw (one screw).
9) Close the top cover of the projector.
z
Close the top cover using the reverse of Step 3), and press the center of the top cover.
10) Reconnect the video cable disconnected in 2) to the connecting terminal.
11) Replace the air lter and electrostatic lter.
z
Refer to “Replacing the air lter and electrostatic lter” (
page 101) for details about the procedure.
12) Insert the power plug into a power outlet, and press the <ON> side of the <MAIN
POWER> switch to turn on the power.