[PICTURE] menu
ENGLISH - 51
Settings
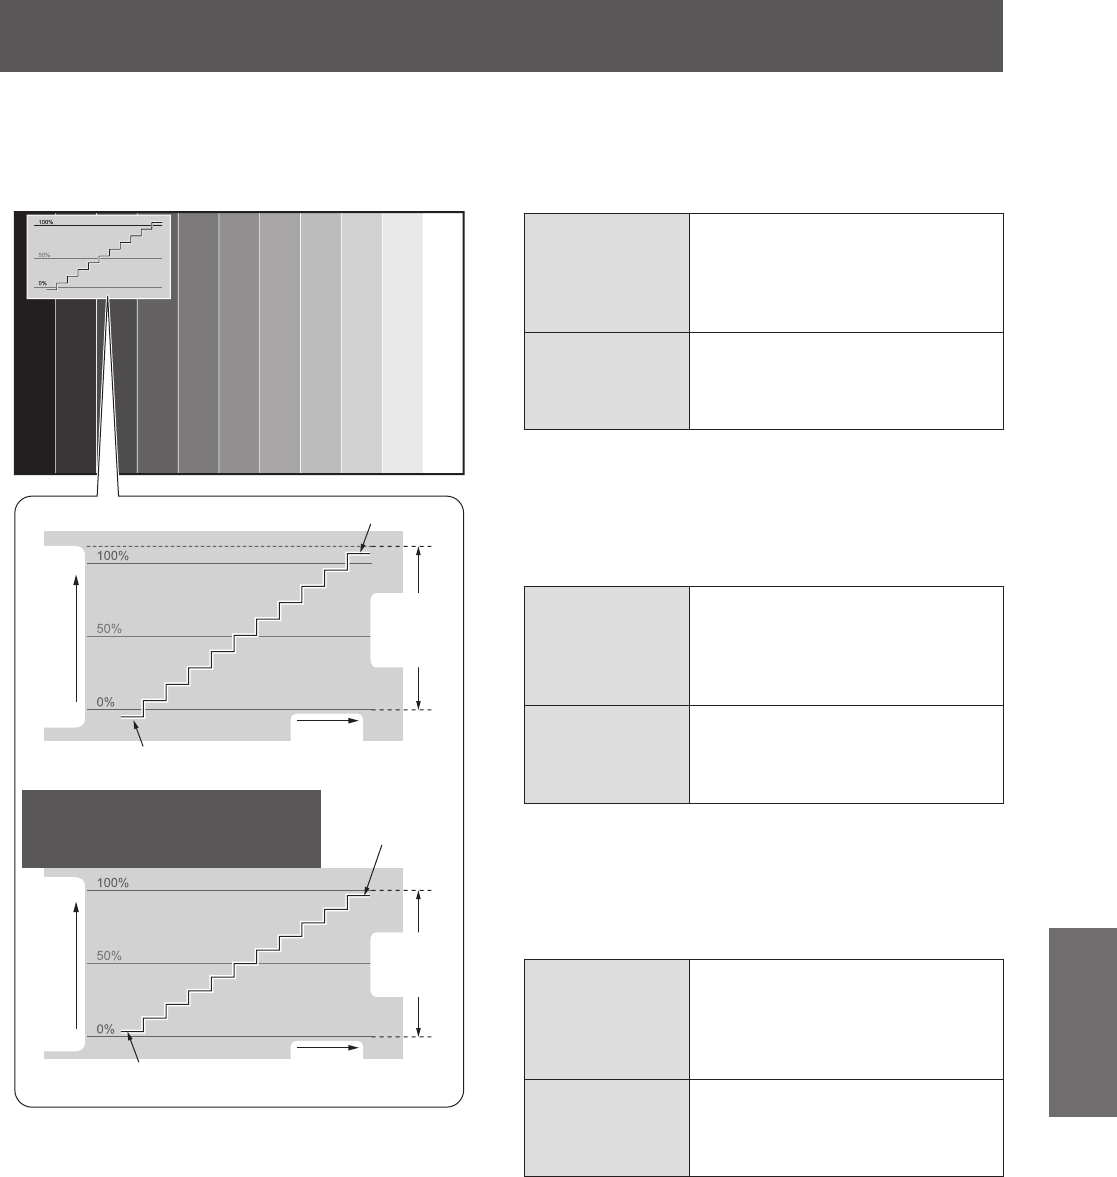
To adjust the waveform
Project the brightness adjustment signal of a
commercial test disk (0% (0 IRE or 7.5 IRE) - 100%
(100 IRE)) and perform adjustment.
$GMXVWWR
$GMXVWWR
6LJQDOOXPLQDQFH
OHYHO
6LJQDOOXPLQDQFH
OHYHO
,PDJH
GLVSOD\DEOH
DUHD
,PDJH
GLVSOD\DEOH
DUHD
$GMXVWWR
$GMXVWWR
6FUHHQ
SRVLWLRQ
6FUHHQ
SRVLWLRQ
:LWKFRPSXWHULQSXWH[FHSWPRYLH
EDVHGVLJQDORU>+'0,6,*1$/
/(9(/@>@
While the waveform monitor is displayed, press
the <MENU> button to adjust the waveform using
[PICTURE] of the main menu item and [ADVANCED
MENU] of the sub-menu item.
1) Adjust [FULL SCAN(Y)]/[SINGLE LINE
SCAN(Y)].
z
Select the [PICTURE] menu and press
to
adjust [BRIGHTNESS] and then [CONTRAST].
[BRIGHTNESS]
Adjusts the black level of the
display signal to 0% (0 IRE or
7.5 IRE).
z
Setting range
-
32 to +32
[CONTRAST]
Adjusts the white level of the
display signal to 100% (100 IRE).
z
Setting range
-
64 to +64
2) Adjust [FULL SCAN(R)]/[SINGLE LINE
SCAN(R)].
z
Select the [PICTURE] menu
→
[ADVANCED
MENU] and press
to adjust [BRIGHTNESS
R] and then [CONTRAST R].
[BRIGHTNESS R]
Adjusts the black level of the
display signal to 0% (0 IRE or
7.5 IRE).
z
Setting range
-
16 to +16
[CONTRAST R]
Adjusts the white level of the
display signal to 100% (100 IRE).
z
Setting range
-
32 to +32
3) Adjust [FULL SCAN(G)]/[SINGLE LINE
SCAN(G)].
z
Select the [PICTURE] menu
→
[ADVANCED
MENU] and press
to adjust [BRIGHTNESS
G] and then [CONTRAST G].
[BRIGHTNESS G]
Adjusts the black level of the
display signal to 0% (0 IRE or
7.5 IRE).
z
Setting range
-
16 to +16
[CONTRAST G]
Adjusts the white level of the
display signal to 100% (100 IRE).
z
Setting range
-
32 to +32
