


Sending Scan Files by E-mail
42
4
H
HH
H
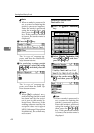
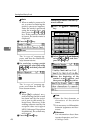
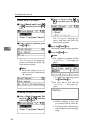
Specify the e-mail sender.
To specify a sender, you can select
it using the Quick Dial key, search
for and select it from the Destina-
tion List, or select it by specifying a
registration number.
A Press [Options].
B Select [Sender's Name] using
{
{{
{U
UU
U}
}}
} or {
{{
{T
TT
T}
}}
}, and then press the
{
{{
{OK}
}}
} key.
Note
❒ Step
H
can be omitted if [Key
Op's E-mail Address] is speci-
fied for [Sender's Name Default]
in [Send Settings] of [Scanner
Features].
❒ When a sender is selected,
the sender name is automati-
cally placed in the From field
of the e-mail so that the send-
er can be identified by the re-
cipient.
❒ To prevent misuse of a send-
er name, we recommend you
set a sender's password for
that sender name.
❒ Be sure to select or enter a
sender name. Otherwise the
key operator's e-mail address
is used as the sender name.
See General Settings Guide.
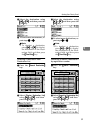
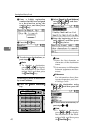
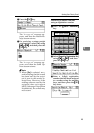
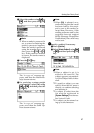
Using a Quick Dial key to select a
sender
A Press the Quick Dial key in
which the sender is registered.
Reference
For more information about
how to register the destina-
tion, see General Settings
Guide.
Note
❒ When a sender's password is
set, a screen for entering the
sender's password appears.
Enter the sender's password
using the number keys, and
then press the {
{{
{OK}
}}
} or {
{{
{#}
}}
}
key. If the password entered
is correct, the sender name is
displayed.
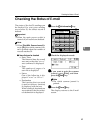
B Press the {
{{
{OK}
}}
} key.
The “
Accepted
” message ap-
pears, and then the Return Re-
ceipt screen returns.
On Hook Dial
05 06 07 08
09 10 11 12
13 14 15 16
SymbolsSpaceShift
01 02 03 04
@.
_
_
Search
Destination
Check
Destination
Job
Information
ABC DEF GHI JKL
MNO PQR STU VWX
YZ
- &@.
_
AAH013S