


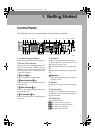

Faxing
12
2
❒
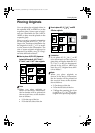
When sending a fax, the image out-
put at the other end depends on the
size and orientation of paper used in
the receiver's terminal. If the receiver
does not use paper of the same size
and orientation as that of the origi-
nal, the fax image may be reduced in
size, trimmed at both edges, or di-
vided into two or more sheets. When
sending an important original, we
recommend you ask the receiver
about the size and orientation of the
paper used in their terminal.
❒ Make sure that all ink, correcting
fluid etc., has completely dried be-
fore placing your original. If it is
still wet, the exposure glass will be
marked and those marks will ap-
pear on the received image.
❒
If you place an A4
L
or 8
1
/
2
"
×
11"
L
size original in the portrait orienta-
tion, the machine rotates the image
by 90 degrees before sending. See
p.33 “Transmission with Image
Rotation”, Facsimile Reference <Ad-
vanced Features> .
❒
You can send the first pages from the
exposure glass then the remaining
pages from the ADF or ARDF. After
you have removed the last page
from the exposure glass, insert the
remaining pages in the ADF or AR-
DF, and then press the
{
{{
{
Start
}
}}
}
key.
❒ When using the Internet Fax func-
tion, documents transmitted are
sent at A4 size. Documents larger
than A4 are reduced to A4 width.
Reference
For how to place two-sided documents,
see
p.7 “Two-Sided Transmission
(Double-Sided Transmission)”,
Facsimile Reference <Advanced Fea-
tures> . The ARDF is required.
For acceptable types of originals,
see p.109 “Acceptable Types of
Originals”, Facsimile Reference <Ad-
vanced Features> .
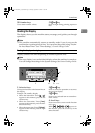
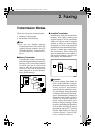
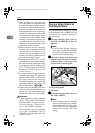
Placing a Single Original on
the Exposure Glass
Place originals that cannot be placed
in the optional ADF or ARDF, such as
a book, on the exposure glass one
page at a time.
A
AA
A
Lift the exposure glass cover or
the ADF or ARDF by at least 30
degrees.
Note
❒ If you do not lift the exposure
glass cover or the ADF or ARDF
by at least 30 degrees, the origi-
nal size will not be detected.
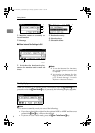
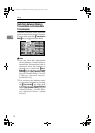
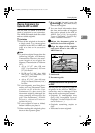
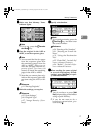
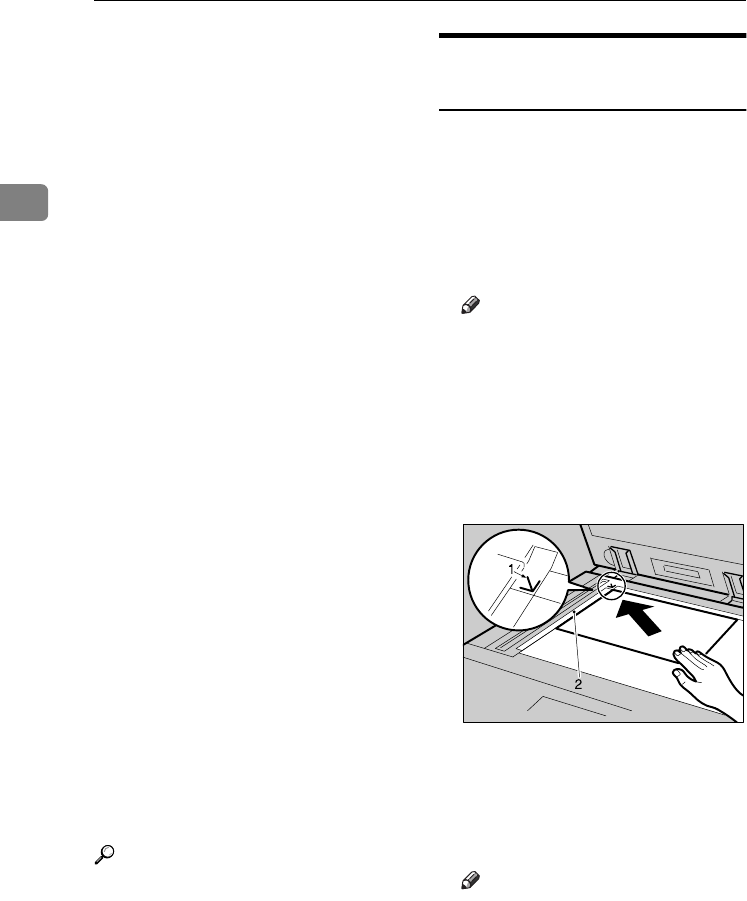
B
BB
B
Place the original face down and
align its upper left corner with the
reference mark at the upper left
corner of the exposure glass.
1.
Positioning mark
2.
Left Scale
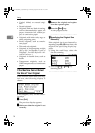
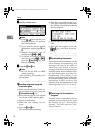
C
CC
C
Lower the exposure glass cover or
the ADF or ARDF.
Note
❒ When setting a bound original,
the received image may contain
some black areas. To reduce this
effect, hold down the original to
prevent the bound part from
rising.
AAN050S
Kir-C2-AEcombine_F_FM.book Page 12 Monday, September 29, 2003 11:36 AM