


Installing the Network Driver Using the EtherCD 45
Before installing the NIC software:
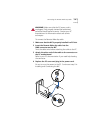
■ Make sure that the NIC is installed in the PC and
connected to the network.
■ Make sure that you have the Windows 95 installation
files. These files may be on a CD or diskettes, or they
may have been copied to your hard disk when
Windows 95 was installed on your PC.
To begin the driver installation, turn the PC power on.
Windows detects the NIC and depending on the version of
Windows 95 that you have installed, either the New
Hardware Found screen appears, or the Update Device
Driver Wizard starts.
New Hardware Found
If the New Hardware Found screen appears, follow this
procedure to install the NIC driver:
1 Select the Driver from disk provided by hardware
manufacturer option, and then click OK.
The Install From Disk screen appears.
2 Insert the EtherCD in the CD-ROM drive, enter the
path to the CD-ROM drive, and click OK.
■ If networking has already been installed on your PC,
go to step 4.
■ If this is the first time that networking is being
installed on your PC, the Identification tab of the
Network screen appears. Go to step 3.
3 In the specified fields of the Identification tab screen,
enter the following information, and then click Close.
■ Computer Name—Identifies the PC on the network
for other users. This entry must be a unique name of
15 characters or fewer, containing no spaces.
■ Workgroup—Identifies the group (for example,
your department name) to which your PC belongs. If
your computer is connected to a peer-to-peer
If you encounter problems during the installation, see
W95NDIS.TXT and TROUBLE.TXT (located in the HELP
directory on the EtherCD) for troubleshooting tips.