


CV7 Touch Panel Accessories
19
7" Modero Widescreen Touch Panels
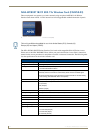
Before Upgrading the Wireless Card - Read This...
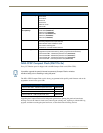
1. Upload the latest panel-specific kit file to your Modero touch panel and then confirm the firmware
file update was successful.
Each panel should be updated using its associated panel-specific kit file (SW2258_02 for the
CV7). This new firmware file provides both backwards compatibility with the previous
802.11b cards and new security protocols for the new 802.11g wireless CF card.
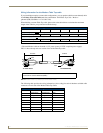
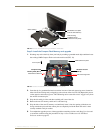
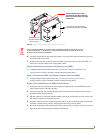
Installation and Upgrade of the Internal NXT Components
Upgrading the cards within the Table Top panel involves removing the outer housing (with speaker
plate), removing the existing card, replacing it with the 802.11g upgrade, and then placing the outer
housing back onto the NXT panel, as described in the following sections.
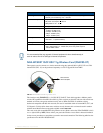
These panels do not come factory installed with the NXA-WC802.11GCF wireless interface card. This
card must be ordered separately from AMX as part of the 802.11g upgrade kit (FG2255-07).
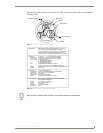
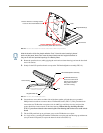
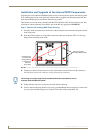
Step 1: Remove the existing NXT Outer Housing
1.
Carefully detach all connectors from the rear of the touch panel and then gently place the touch
panel LCD facedown onto a soft cloth to expose the under-side of the base (FIG. 16). This step
helps prevent scratching of the LCD.
2. Tilt the base forward so that both the bottom surface and Housing Screws are easily accessible.
3. While holding the outer housing and base plate at an angle (to prevent it from sliding), use a
grounded Phillips-head screwdriver to remove the four Housing Screws.
This new firmware file provides both backwards compatibility with the previous
802.11b cards and new security protocols for the new 802.11g wireless CF card.
If you don’t first update the firmware file on the panel, before proceeding with the card
upgrade process, you will be required to configure NetLinx Studio to communicate
with the target panel via a direct USB connection.
In this communication scenario, your PC acts as a Virtual NetLinx Master establishing
a secure USB connection to the target panel and then uploading the new Kit file.
Do not use Ethernet cables containing mounting boots. These boots could make
removal of the Ethernet connectors (from the panel) difficult and cumbersome.