


Configuring Communication
72
7" Modero Widescreen Touch Panels
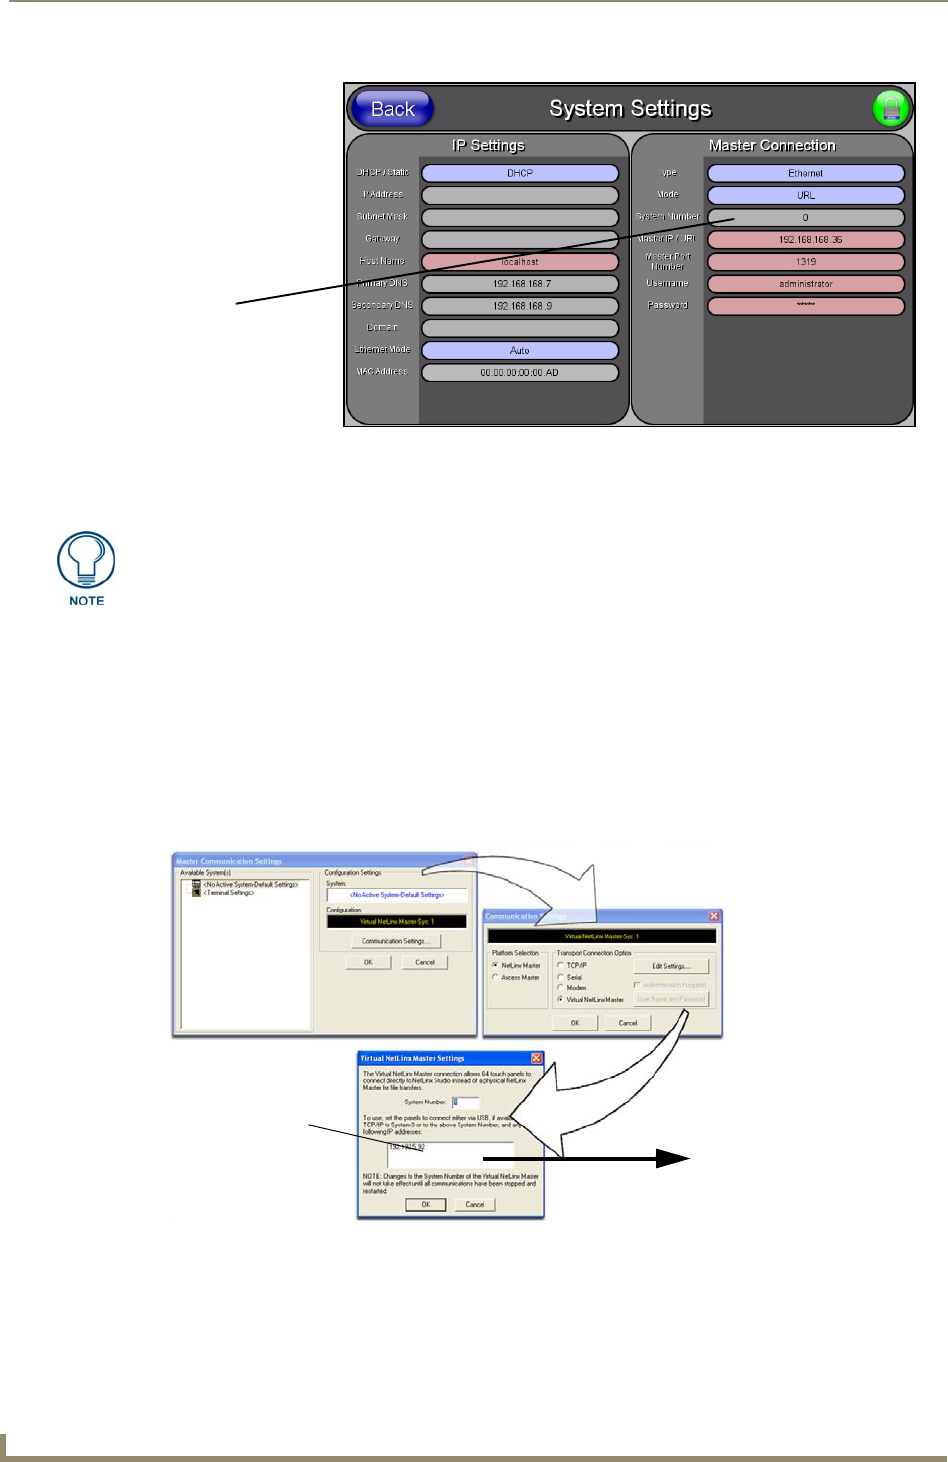
Master Connection section - Virtual Master communication over Ethernet
Before beginning:
1. Verify the panel has been configured to communicate either through an Ethernet cable (connected
from either the panel to a valid Ethernet Hub) or wireless to the Wireless Access Point.
2. Launch NetLinx Studio 2.x (default location is Start > Programs > AMX Control Disc > NetLinx
Studio 2 > NetLinx Studio 2).
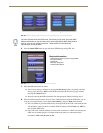
3. Select Settings > Master Communication Settings, from the Main menu to open the Master
Communication Settings dialog (FIG. 69).
4. Click the Communications Settings button to open the Communications Settings dialog.
5. Click on the NetLinx Master radio button (from the Platform Selection section) to indicate that you
are working as a NetLinx Master.
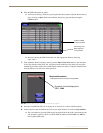
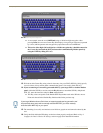
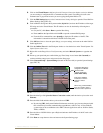
FIG. 68 System Settings page
Obtained
from
NetLinx
Master
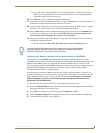
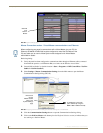
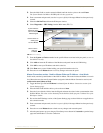
When configuring your panel to communicate with a Virtual Master (on your PC) via
Ethernet, the Master IP/URL field must be configured to match the IP Address of the
PC and make sure to use the Virtual System value assigned to the Virtual Master
within NetLinx Studio.
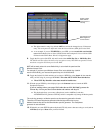
FIG. 69 Assigning Communication Settings and TCP/IP Settings for a Virtual Master
Enter this IP
into the
Master IP/URL
field on the
System Settings
page
IP Addresses of computer
(also obtained by using the
Start > Run > cmd command)