


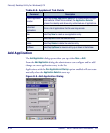


Configuring the Web Server
C-4
Falcon
®
4400 Series with Windows
®
CE
4. The Web Server Login dialog appears. Type Admin in the User Name
box and enter the password you specified. Click
OK, and the Web
Server Configuration
page will appear.
5. Scroll to the bottom of the page, and click
Modify to the right of the
Default Website box. The Default Website page appears.
6. Click the link to
Configure the Virtual Directories. The Virtual Directory
Configuration
page appears.
7. Verify that the following virtual directories are listed on the page:
/WebAdmin/
/NetAdmin/
8. Click
Return to the Default Website configuration page. The Default Web-
site page
appears.
9. Click
Configure the Administrative Users for this Website. The Adminis-
trative Users
page appears.
10. Select
Enabled for Testuser, and then click Update. A message tell-
ing you that your modifications have been saved and asking you to
restart the Web Server appears at the top of the page.
11. To restart the Web Server, select
Restart Web Server from the menu bar.
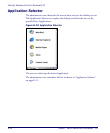
Launching the Network Administration Page
To launch the network administration page from your host PC:
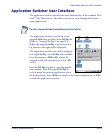
1. Open Internet Explorer and type the following information in the
address bar:
http://<IP address from Falcon 44XX>/NetAdmin. A
dialog box asking for the user name and password appears.
2. Type Testuser in the
User name box and the password you created
for this user in the
Password box, and then click OK. The Network
Administration
page appears.
Web Server Registry Settings
To gain access to a virtual path, a user must be authenticated using NTLM
authentication or Basic authentication. Specify the authentication level by set-
ting the
“a” value for each virtual path.