


3-138 C122-E003-02EN
MMB
CHAPTER 3 Web-UI Operations
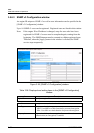
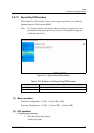
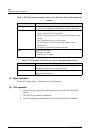
Table 3.105 Buttons in the [Create Selfsigned Certificate] window
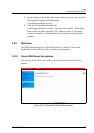
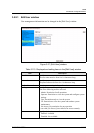
(1) Menu operation
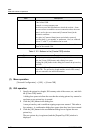
[Network Configuration] → [SSL] → [Create Selfsigned Certificate]
(2) GUI operation
1 Before creating a self-signed certificate, make sure that [Disable] is set in
[HTTPS] in the [Network Protocols] window. If [Enable] is set, set [Disable]
(see Section 3.5.4, "Network Protocols window").
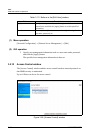
Key length Select a key length (number of bits) for the created private key by
clicking the corresponding radio button:
•1024
•2048
Term (1-4095 days) Specify the validity term in number of days for the created self-
signed certificate.
Country Name Specify two alphabetic characters as the ISO country code of the
owner in the created self-signed certificate:
• Japan: [JP]
• USA: [US]
State or Province
Name
Specify up to 56 valid characters as the state or province name of
the owner in the created self-signed certificate.
Locality Name Specify up to 56 valid characters as the city name of the owner in
the created self-signed certificate.
Organization Name Specify up to 56 valid characters as the organization name
(company name) of the owner in the created self-signed certificate.
Organization Unit Name Specify up to 56 valid characters as the organization unit name of
the owner in the created self-signed certificate.
Common Name Specify up to 56 valid characters as the server domain name of the
owner in the created self-signed certificate.
Email Address Specify up to 40 valid characters as the e-mail address of the
owner in the created self-signed certificate.
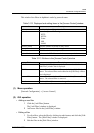
Button Description
Create Self-signed
Certificate
Specify the private key length, ISO country code of the owner, etc.,
click the [Create Self-signed Certificate] button, and a dialog box
opens.
Click the [OK] button in the dialog box to create a self-signed
certificate.
Cancel Click [Cancel] button to cancel creating a certificate.
Item Description