


Imaging (developing) high-voltage power supply
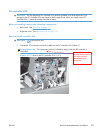
Before proceeding, remove the following components:
●
Rear cover. See
Rear cover on page 116.
●
Right-rear cover. See
Right-rear cover on page 119.
●
Formatter case. See
Formatter case on page 130.
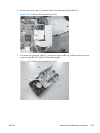
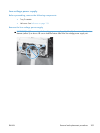
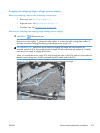
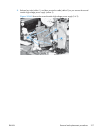
Remove the imaging (developing) high-voltage power supply
CAUTION: ESD-sensitive part.
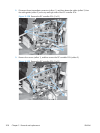
Remove one screw (callout 1), release four tabs (callout 2), remove the cable routing plate (callout 3),
and then remove the imaging (developing) high-voltage power supply PCA.
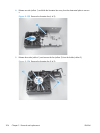
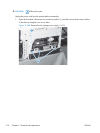
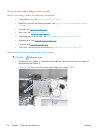
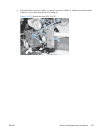
Reinstallation tip Reinsert the power supply by angling the smaller left end behind the DC
controller and driver PCA. Ensure that the power supply sits behind the black tab (callout 4). Carefully
press the power supply to engage all four tabs.
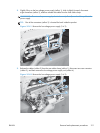
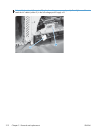
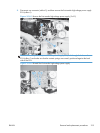
When you reinstall the power supply PCA, look through the holes on the PCA (callout 5) and make sure
that the contact springs are correctly positioned against the back side of the PCA.
Figure 2-163 Remove the imaging (developing) high-voltage power supply
1
2
3
4
5
ENWW
Removal and replacement procedures
213