


40930701TH DRAFT Vesion 87 /
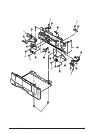
3.3.28 Lever-Paper end & Lever-Paper near end
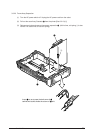
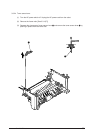
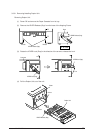
(1) Turn the AC power switch off. Unplug the AC power cord from the outlet.
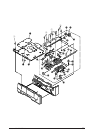
(2) Remove the frame main [See 3.3.12(7)]
(3) Remove screw 1 and then remove the PLATE-Base 2.
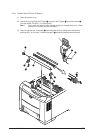
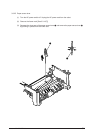
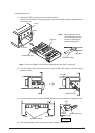
(4) Remove two Spacer-Cord(KGPS-5RF) 4 and then remove FILM-Insulation 4.
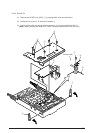
(5) Remove four screws 5 and then remove the FRAME ASS-Hopping 6.
(6) Remove the GEAR-Z58 9 and GEAR-Z42 8.
(At this time, the ADF Bearing 0 can also be detached simultaneously.)
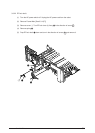
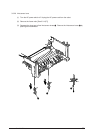
(7) Remove the GEAR-Z38 D, ADF Bearing E, ROLLER-Guide F and SHAFT Hopping G and
Bracket-Sub roller R.
(At this time, the Kock Pin H can also be detached simultaneously.)
(8) Remove two screws 7 and then remove the SPRING-Release A and then remove the
LEVER-Sub roller B and PLATE-Hopping C.
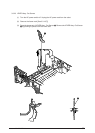
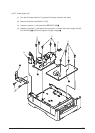
(9) Remove the GEAR-Planet(Z28) I, Plate-Planet J, BRACKET-Spring (Sub) K and
SPRING-Sub ROLLER L.
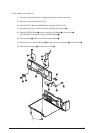
(10) Press the clamp part of Lever-Paper end M and Lever-Paper near end N. Remove the
Lever-Paper end M and Lever-Paper near end N by pushing it upward from the FRAME
Hopping R.
(11) Remove the Connection Cord-Wire O and TR-23-11-14 R CORE P together.
(12) Remove two Photo Sensor Q.