Appendix B IR-IP Interface Module Installation and Operation Manual
B-6 Performing Preliminary Configuration ASMi-52 Ver. 2.5
After configuring IR-IP, it starts normal operation and routes the traffic in
accordance with the user-selected configuration parameters.
To change the parameters of an already-configured IR-IP, establish communication
from a Telnet host using the assigned IP address.
Default IP Communication Parameters
The factory-default IP communication parameters of the interface module are:
• The default IP address of the IR-IP Ethernet port is 192.168.205.1, and the
default IP subnet mask is 255.255.255.252.
• The port will accept IP communication only from the IP address
192.168.205.2. Therefore, as long as the factory defaults are in effect, you
must assign this address to the Telnet host used to configure IR-IP.
Using the IP learning mechanism, as explained below you can change the default
parameters.
In the default configuration, the IR-IP WAN interface is disabled. In order to enable
the WAN interface, you have to modify the Ethernet port address or the IP subnet
mask.
B.5 Performing Preliminary Configuration
The software necessary for performing all the management and configuration
functions is stored in the IR-IP interface module, and therefore you only need a
regular Telnet host to perform all the activities described in this appendix.
A Telnet host is any computer, e.g., an IBM PC or compatible that fulfills the
following minimum requirements:
• A standard 10BaseT Ethernet interface
• A TCP/IP protocol stack, and therefore is capable of supporting IP
communication through the Ethernet interface
• Telnet client software
• A ping utility.
Outline of Preliminary Configuration
To perform the preliminary configuration procedure:
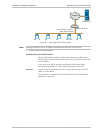
1. Connect the Telnet host to the IR-IP interface module.
2. Configure the Telnet host to enable communication with the IR-IP interface
module using the default IP parameters.
3. Establish communication with IR-IP and assign the prescribed IP address to its
LAN interface.
4. Establish again communication with IR-IP and continue the preliminary
configuration in accordance with the Quick Setup section below.
Note


