Installation and Operation Manual Appendix B IR-IP Interface Module
ASMi-52 Ver. 2.5 IR-IP Management Utility B-9
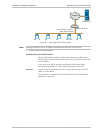
At this stage, the communication with IR-IP router is lost, because its IP address
has been changed. Therefore, you must reconfigure the destination IP address of
the Telnet host. If you wish, you may also change the temporary IP address
assigned to the host (192.168.205.2) back to its permanent address.
Changing the LAN IP Address of a Configured IR-IP
The LAN IP address of an already-configured IR-IP can be changed while it
operates. This means it is not necessary to turn ASMi-52 off before starting the
configuration procedure. Note however that the IP traffic flow through IR-IP will
be disrupted until the other stations in the IP network learn the new address.
To change the LAN IP address of an already-configured IR-IP, use the procedure
described above for a new IR-IP with the following differences:
• Configure the destination address of the ping utility to the new LAN interface
IP address. It is not necessary to change the Telnet host source address.
• When ready, set section 1 of the IR-IP DIP switch to ON.
• The ERR indicator starts flashing faster (approximately four times a second).
• Perform steps 4, 5 of the procedure used for a new IR-IP.
B.6 IR-IP Management Utility
General Operating Procedures
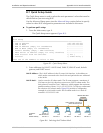
The IR-IP interface module is managed via a simple, menu-driven utility that uses a
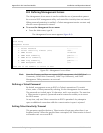
basic terminal user interface. A typical screen is shown in Figure B-3.
As seen in Figure B-3, each screen has a header that identifies the device being
configured and its logical name, assigned by the user, followed by the running
software revision and date. The bottom line of the screen displays prompts that
guide you in the execution of the various activities.
Use the following general procedures to perform the desired activity:
• To change a parameter or to select a menu item, type the corresponding line
number.
• For a parameter, which has a discrete set of values, the parameter values are
enclosed in brackets [ ]. To select a new value, press the spacebar to scroll
among the available values until the desired value is displayed, and then press
<Enter> to select the displayed value.
• To enter a value which requires free text entry, type in the desired string and
then press <Enter>. Use backspace to erase the current string.
• After all the parameters have been selected, a prompt appears, requesting that
you confirm the changes.
For proper display of the screens, you must:
• Select a fixed-pitch system font for the display. Use your operating system
documentation to find how to select a proper font.
• Configure the Telnet utility to use VT-100 terminal emulation.
Note


