NOOK User Guide Registering your NOOK 65
Your NOOK leads you through the welcome pages that include registration the first time you turn it
on.
To register your NOOK (Wi-Fi + 3G model) using the welcome pages, you must be in an
area with B&N Fast & Free Wireless network coverage, in a Barnes & Noble Bookstore in
the United States, or at an AT&T hotspot in the United States. Alternatively, tap Register
later and register after connecting to any Wi-Fi hotspot.
To register your NOOK Wi-Fi using the welcome pages, you can be in a Barnes & Noble
Bookstore in the United States, at an AT&T hotspot in the United States, or you can
connect to any other Wi-Fi hotspot.
You can register either nook model later from Settings if the abovementioned circumstances are
true, as well as after connecting to any Wi-Fi hotspot.
The information you need during registration is:
• BN.com account email address
• BN.com account password
If your NOOK informs you that your account information is not valid, double check the information
you entered. You might have mistyped something.
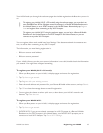
To register your NOOK (Wi-Fi + 3G model):
1 When you first power on your NOOK, it displays pages and menus for registration.
2 Tap Tap here to get started.
3 Tap Register with your existing account.
4 Enter the email address and password for your Barnes & Noble online account, and tap Submit.
5 Tap OK to close the message about successful registration.
6 You are given the chance to take a quick tour, to learn about your NOOK’s controls and
features. Tap Take the tour.
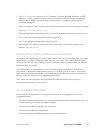
To register your NOOK Wi-Fi:
1 When you first power on your NOOK, it displays pages and menus for registration.
2 Tap Tap here to get started.
3 (NOOK Wi-Fi) If you are not already connected to a Wi-Fi hotspot in a Barnes & Noble
Bookstore or an AT&T hotspot in the United States, your NOOK Wi-Fi prompts you to
connect to a local Wi-Fi hotspot. Tap Go to Wi-Fi Settings.


