


Section 3: Operation
3-50 RPMSP & CSP70-D100U User’s Manual
In a multiple-projector wall, you will likely want to precisely match color and intensity
from image-to-image so that the full wall is as uniform as possible. This matching is
typically done in conjunction with brightness uniformity and edge blending.
Preliminary Calibration
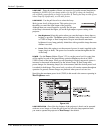
As a final part of the manufacturing process, all primary colors in the projector are
precisely set to pre-established values to ensure that overall color performance is
optimized and is as accurate as possible (refer back to Figure 3.20). Upon installation
at a site, however, lighting and other environmental factors may slightly change how
these colors appear on your screen. While the change is negligible in most cases, you
may prefer to recover the originally intended color performance before trying to
match colors from several projectors. Or you may be renting a projector in which the
colors were corrected for use at its previous site, but are not ideal for yours.
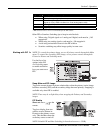
The recommended first step in achieving such consistency is to use a color meter to
measure the native primary colors—red, green, blue, and white—as they appear at the
screen and record these as Color Primary Settings in the Service menu (password-
protected) for each projector. On the basis of these new values, which are stored in
memory, each projector will then automatically calculate any necessary corrections to
reproduce the original factory colors under the current environmental conditions. This
essentially calibrates a projector to its surroundings, compensating for factors such as
screen type, lamp and/or ambient lighting that can alter the final color characteristics
on-screen, and will improve color accuracy and consistency in a group of projectors. It
ensures a good starting point for further customizing and matching; however, is not
critical for all installations.
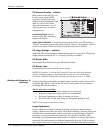
To return to the factory-set color primaries, such as when a projector is moved to
different site, you must access the Service menu (password-protected). Select the
Reset to Factory Defaults? option in the Color Primaries submenu. Then repeat the
calibration process describe above, if desired, and continue with matching of colors.
Color Adjustment Procedure
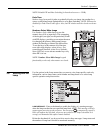
Once the Color Primary Settings are calibrated for the site (see above), use the Color
Adjustments by X,Y or Color Saturation menu to further refine each projector’s
fundamental colors so that the hue and intensity of each color appears the same from
one display to another. Once matched, you will have created a single new shared
range of colors or “color gamut” that all of your projectors can produce. This
palette—named User 1, 2, 3 or 4—can be applied or disabled for a source at any time
throughout a bank of adjacent displays, simplifying both the setup and maintenance of
a “seamless” wall.
1. Set up and optimize all projector settings. You can ignore color temperature, since
you will be redefining color performance in this procedure, but do optimize each
projector in every other aspect. Closely align all screen edges.
2. Assign projector numbers to make communications easier. Use desired keypad.
3. Use the same lamp mode for all projectors, and do the following:
Set Select Color Adjustment to “Max Drives”
Display a full white test pattern
Adjust lamp power and Optical Aperture until adjacent white fields appear the
same brightness.
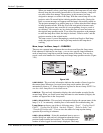
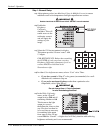
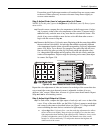
Matching Colors
'
In Multi
p
le Screens