


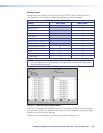

IN1606 and IN1608 Series Scaling Presentation Switcher • Internal Web Pages 95
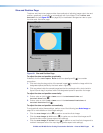
Size and Position Page
The Size and Position page provides three methods of adjusting image output size and
position: graphically, numerically, or automatically with Auto-Image. Click the Size and
Position
icon (see figure 58,
5
on page 86) on the Global Navigation Bar to open
the Size and Position page.
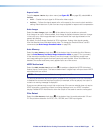
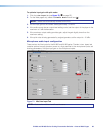
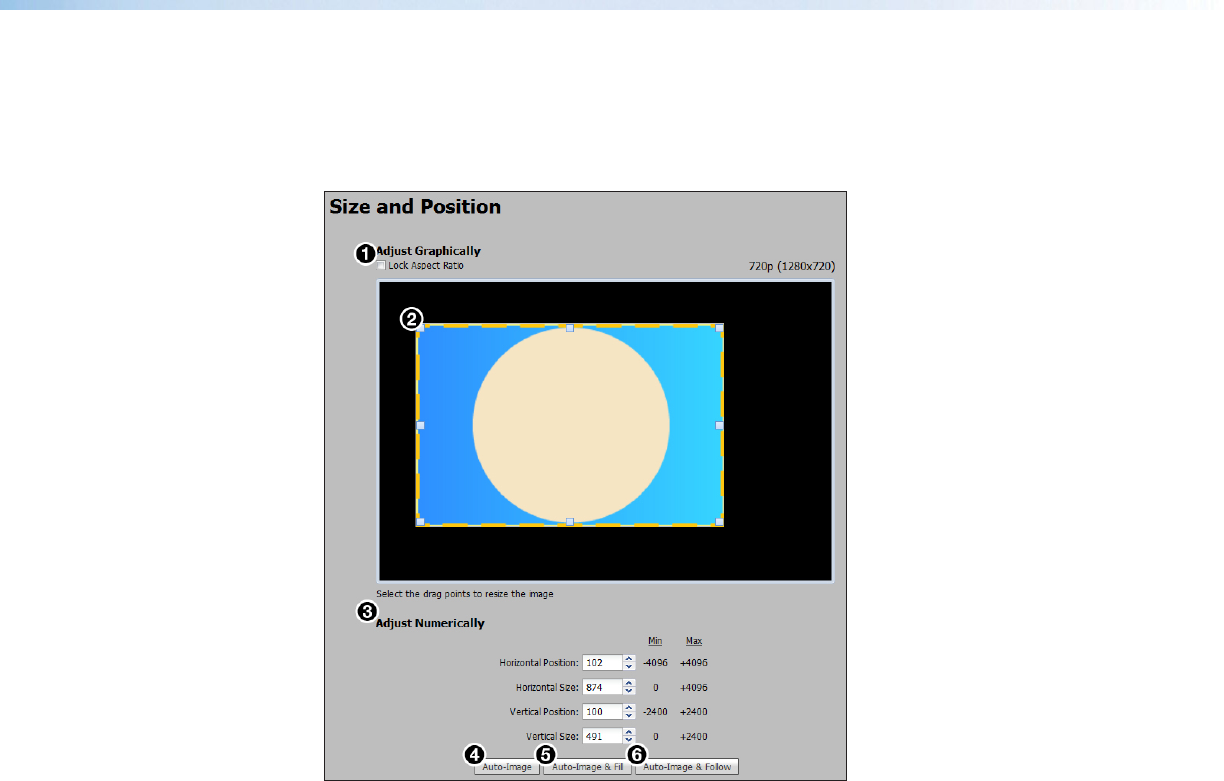
Figure 68. Size and Position Page
To adjust the size and position graphically:
If desired, click the Lock Aspect Ratio check box (see figure 68,
1
) to constrain
proportions.
1. Click and drag the drag points of the sample image (
2
) to resize the image within the
designated space (defined by the black area in figure 68).
2. Click anywhere inside the sample image (see the blue rectangle with a circle inside in
figure 64) and drag it anywhere within the designated space to reposition the image.
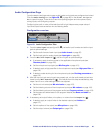
To adjust the size and position numerically:
1. Enter a value or click the Up or Down arrow in the Horizontal Size and
Vertical Size fields (
3
).
2. Enter a value or click the Up or Down arrow in the Horizontal Position and
Vertical Position fields (
3
).
To adjust the size and position automatically:
To automatically adjust these settings, perform one of the following (see Auto-Image on
page 30 for more details on Auto-Image settings):
• Click the Auto-Image button (
4
) to perform a one-time Auto-Image.
• Click the Auto-Image & Fill button (
5
) to perform a one-time Auto-Image and fill
the entire video output (ignores aspect ratio settings).
• Click the Auto-Image & Follow button (
6
) to perform a one-time Auto-Image and to
maintain the aspect ratio of the input signal (ignores aspect ratio settings).