


Intermate100 and Intermate101 Print Server Administration Manual 26
Windows 2000 and Windows XP: Raw Socket Printing (Standard TCP/IP Port)
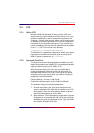
10 The final window will be presented. Click “Finish”.
11 If you have chosen to print a test page in Step
9
, you will be
presented with a window explaining what is going on. If the
printout is ok, click OK. If you should need to choose
Troubleshoot, follow the on-line help instructions.
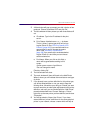
What if you want the printer definition to use a different port
value from 9100?
Choose Settings > Printer, right-click on the new printer you
have defined, and choose “Properties”.
1 Select the Ports tab.
2 Highlight the line for the port and printer you have already
marked for this printer and click “Configure Port”.
3 This will bring up a “Port Settings” Window. Change what is
entered in the Port Number field (in the “Raw Settings”
block), for example to 29100 (a setting which must also
exist in the print server). This explains the logic in the
naming example given above in the note to step
7
,
page 25
.
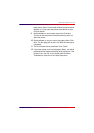
Note that you cannot change the port name. You can
change the IP address, but doing so will create a mismatch
to the information in the print server, so don’t!
4 Complete the “Port Settings” by clicking OK.
Tip:
It is possible to use the Intermate “Port 9100" Print
Port instead of the Windows native protocol. This
has the advantage that you can designate a port
other than 9100 without having to go back and re-
configure. Just follow the instructions in
“Internet
Print Protocol” [page 30]
, but choose “Port 9100"
instead of “LPR” in step
3
. The “Port Name”
generated will look something like this:
IMA_192.168.0.227:9100
and if you, for example, designate port 29100, the name gen-
erated will look like this:
IMA_192.168.0.227:29100