Scanning Functions
ADVANCED OPERATION GUIDE 2-11
4
Enter a file name between one and 30 characters using the numeric keys (refer to
Character Entry in the Operation Guide) and press Enter. The Additional Info screen
is displayed. The factory default setting for the file name is doc.
5
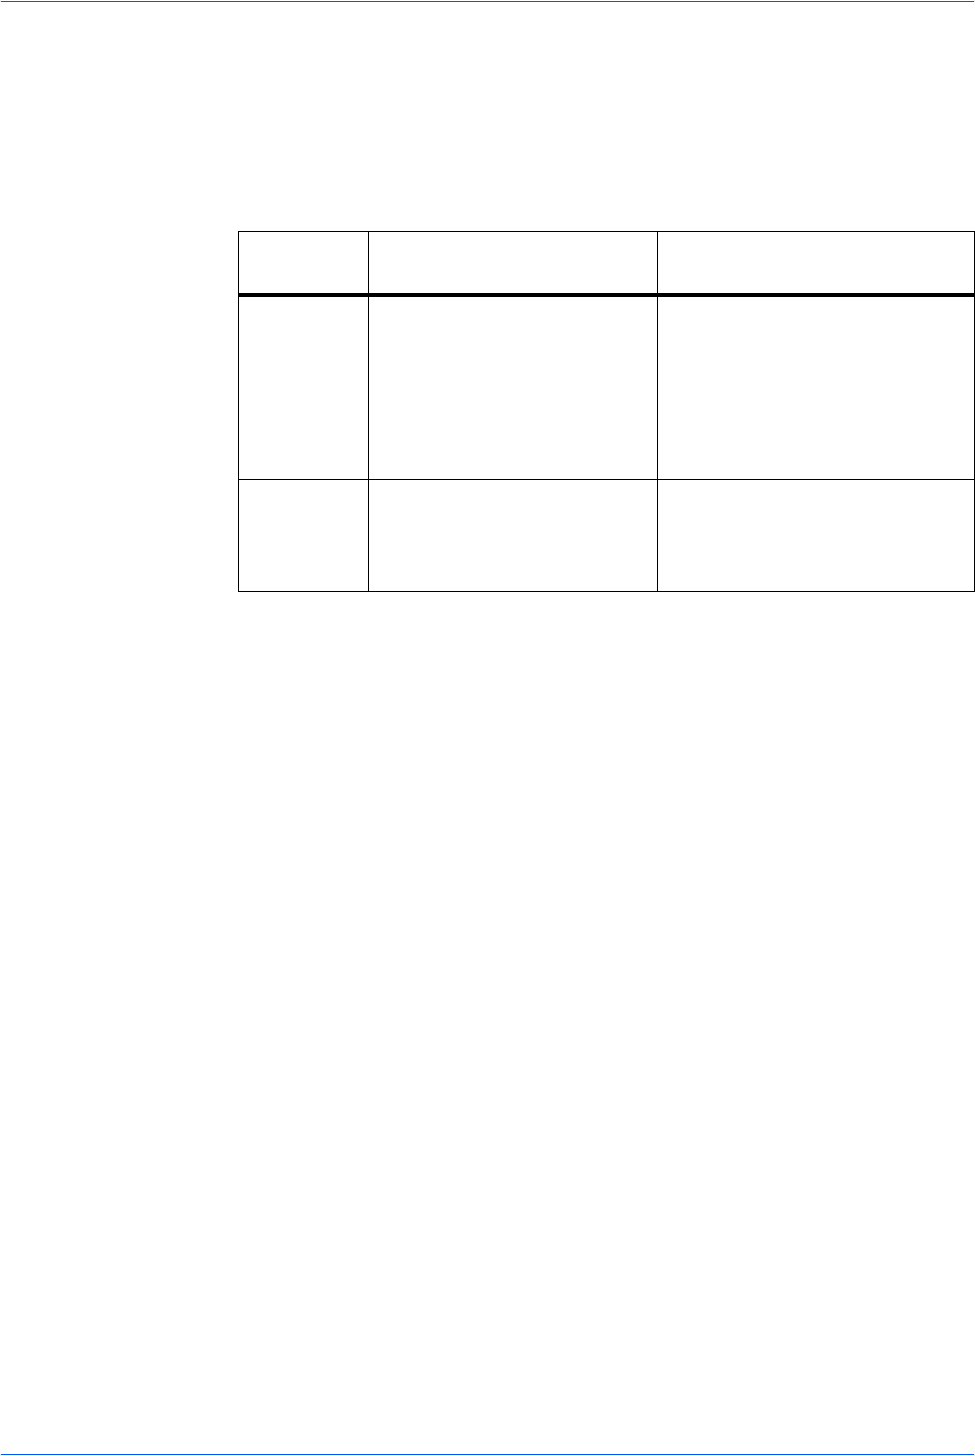
Press S or T to select the information that will be added to the file name and press
Enter. The following table shows how the file name is constructed. The display
shows Completed and returns to the Function screen.
6
Press right Select. The display returns to the basic screen.
Entering the Subject and Body Message of the E-Mail
The subject and body message of the e-mail to which the scanned image is attached
can be edited according to preference. Change the subject and the message
manually as necessary. On is displayed on the basic screen when any characters
are entered in the Subject or the Message, and Off is displayed when nothing is
entered.
1
Press Send. The basic screen is displayed.
2
Press right Select. The Subject Entry screen is displayed.
3
Enter the subject (60 characters maximum).
4
Once the subject has been entered, press Enter. The Message Entry screen is
displayed.
5
Enter the message (60 characters maximum).
6
Once the message has been entered, press Enter. The display shows Completed
and returns to the basic screen.
Selected
Item
File Name Example Description
Date and
Time
doc04272005145608.tif Adds the date and time to the
default file name. The example
shows the scanning job stored at
14:56:08 on April 27, 2005. The
display sequence of Year, Month,
and Day can be changed, refer
to Date Format on page 5-11.
Job No. doc0023_001.jpg
doc0023_002.jpg
Adds the job number to the
default file name. This is
displayed as a four-digit number
between 0001 and 9999.
