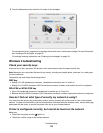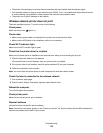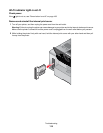
c If necessary, select Network Status in the Show pop-up menu.
The AirPort status indicator should be green. Green means the port is active (turned on) and connected.
Notes:
• Yellow means the port is active but is not connected.
• Red means the port has not been configured.
d From the Show pop-up menu, select AirPort.
e Click TCP/IP.
• The IP address appears as four sets of numbers separated by periods, such as 192.168.0.100.
• The "Router" entry is typically the wireless access point (wireless router).
2 Ping the wireless access point (wireless router).
a From the Finder desktop, click Applications.
b From Applications, double-click Utilities.
c Double-click Network Utility, and then click Ping.
d Type the IP address of the wireless access point (wireless router) in the network address field. For example:
10.168.0.100
e Click Ping.
3 If the wireless access point (wireless router) responds, you will see several lines that display the number of bytes
received from the wireless access point (wireless router). This ensures that your computer is connected to the
wireless access point (wireless router).
4 If the wireless access point (wireless router) does not respond, nothing is displayed. You can use Network
Diagnostics to help resolve the problem.
Run the Wireless Setup Assistant again
If your wireless settings have changed, you must run the printer wireless setup again. Some reasons your settings
may have changed include your having manually changed your WEP or WPA keys, channel, or other network
settings; or the wireless access point (wireless router) having been reset to factory defaults.
Notes:
• If you change network settings, change them on all the network devices before changing them for the wireless
access point (wireless router).
• If you have already changed the wireless network settings on your wireless access point (wireless router), you
must change the settings on all the other network devices before you can see them on the network.
1 From the Finder desktop, double-click the Lexmark 4800 Series folder.
2 Double-click Wireless Setup Assistant.
3 Follow the instructions on the computer screen.
Wireless Setup Assistant cannot communicate with the printer during
installation
These are possible solutions. Try one or more of the following:
Check power
Make sure the light is on.
Troubleshooting
120


