3 Place the required stack of banner paper on the top cover.
4 Feed the leading edge of the banner paper into the printer first.
W
F
II
P
R
I
N
T
I
N
G
5 Make sure:
• The paper is loaded in the center of the paper support.
• The paper guides rest against the edges of the paper.
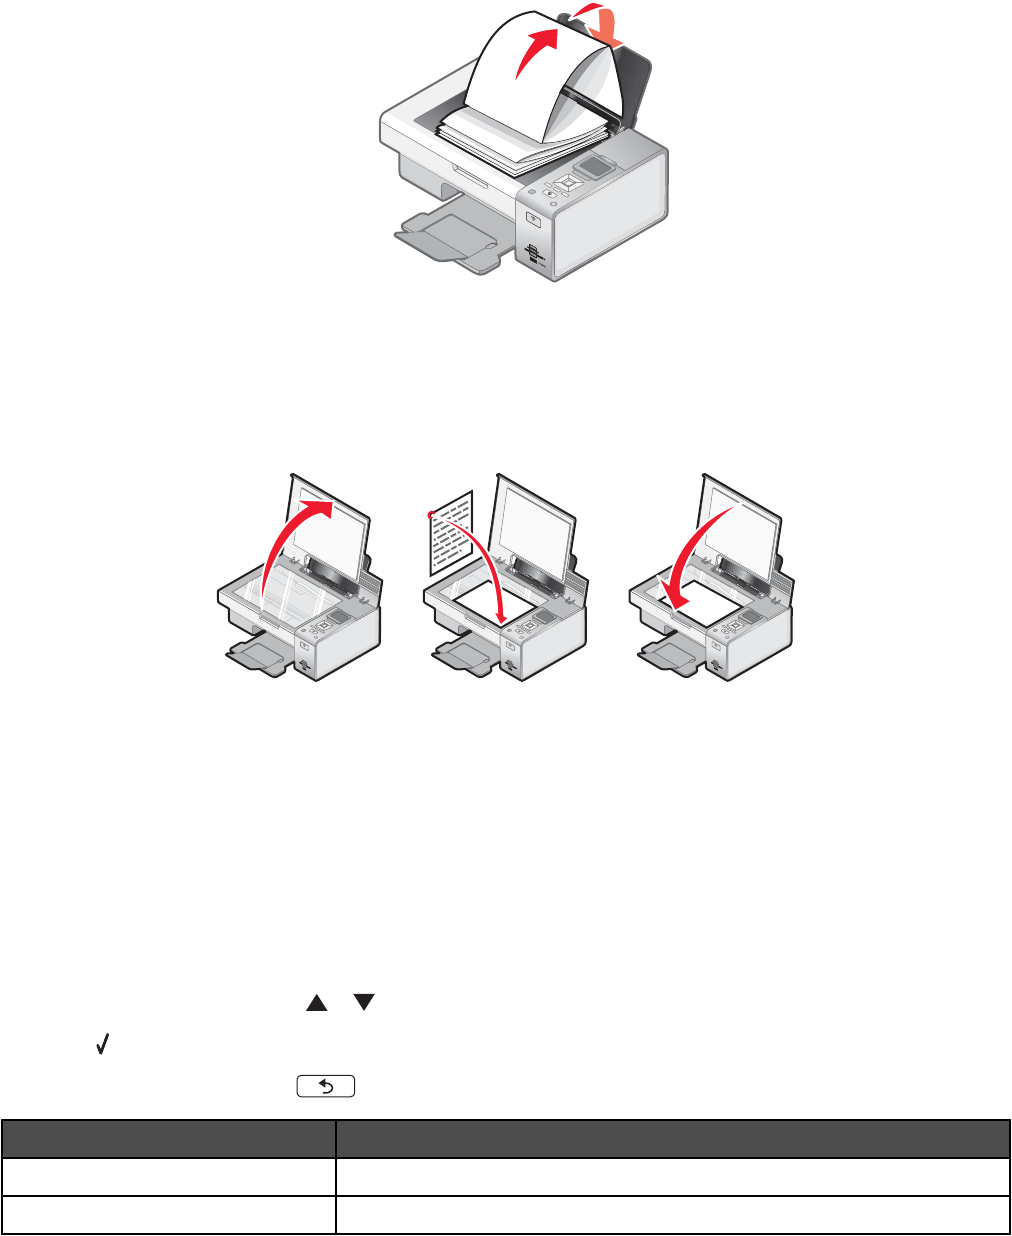
Loading original documents on the scanner glass
W
F
I
I
P
R
I
N
T
I
N
G
W
F
II
P
R
I
N
T
I
N
G
W
F
II
P
R
I
N
T
I
N
G
You can copy, scan, and print photos, text documents, magazine articles, newspapers, and other publications. You
can also scan a document for faxing.
1 Make sure the printer is on.
2 Open the top cover.
3 Place the original document facedown on the scanner glass in the lower right corner.
4 Close the top cover to avoid dark edges on the scanned image.
Using the Paper Handling submenu
1 From the Setup menu, press or repeatedly until Paper Handling is highlighted.
2 Press .
3 After changing values, press to save these values and exit this submenu.
Use this To
Size Set the paper size.
Type Specify paper type.
44


