


Scan troubleshooting
Scanner does not respond
These are possible solutions. Try one or more of the following:
Check messages
If an error message is displayed, see “Error messages” on page 143.
Check power
If the light is not on, see “Power button is not lit” on page 106.
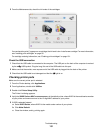
Make sure the printer is set as the default printer and is not on hold or paused
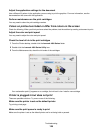
To set printer as default:
1
From the Finder desktop, choose Applications Utilities Print Center or Printer Setup Utility.
2 From the Printer List dialog, select your printer.
3 Click the Make Default icon.
To resume print jobs:
1
From the Finder desktop, choose Applications Utilities Print Center or Printer Setup Utility.
2 From the list of printers, double-click the name of your printer.
3 From the Printer pop-up menu, click Start Jobs if you want to resume all print jobs in the queue; if you want to
resume a particular print job, select the document name, and then click Resume.
Uninstall and reinstall software
For more information, see “Removing and reinstalling the software” on page 148.
Scan was not successful
These are possible solutions. Try one or more of the following:
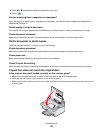
Check USB cable connection
If the printer is connected to the computer through a USB connection:
1 Check the USB cable for any obvious damage.
2 Firmly plug the square end of the USB cable into the back of the printer.
3 Firmly plug the rectangular end of the USB cable into the USB port of the computer.
The USB port is marked with the
USB symbol.
Make sure the printer is communicating with the correct computer
If the printer is connected to a network with multiple computers, you must select, using the control panel of the printer,
the computer from which you are sending the scan.
Troubleshooting
134