Review steps to improve print quality
See “Improving print quality” on page 100.
Remove sheets as they are printed
To avoid ink smudging when you are working with the following media, remove each sheet as it exits, and allow it
to dry:
• Documents with graphics or images
• Photo paper
• Heavyweight matte or glossy paper
• Transparencies
• Labels
• Envelopes
• Iron-on transfers
Note: Transparencies may take up to 15 minutes to dry.
Use a different brand of paper
Each paper brand accepts ink differently and prints with color variations. If you are printing photos or other
high-quality images, for best results use Lexmark PerfectFinish Photo Paper or Lexmark Photo Paper. Do not use
Lexmark Premium Photo Paper. Your print cartridges are not compatible with this type of paper.
Check paper condition
Use only new, unwrinkled paper.
Removing and reinstalling the software
Software may not be installed correctly. For more information, see “Removing and reinstalling the software” on
page 148.
Poor quality at the edges of the page
These are possible causes and solutions. Try one or more of the following:
Check minimum print settings
Unless you are using the borderless feature, use these minimum print margin settings:
• Left and right margins:
– 6.35 mm (0.25 in.) for letter size paper
– 3.37 mm (0.133 in.) for all paper sizes except letter
• Top margin: 1.7 mm (0.067 in.)
• Bottom margin: 12.7 mm (0.5 in.)
Select the Borderless print feature
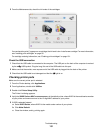
1 With a document open, choose File Page Setup.
2 From the “Format for” pop-up menu, choose 4800 Series.
3 From the Paper Size pop-up menu, choose the paper size loaded.
Note: Make sure you choose an option that has (Borderless) in it. For example, if you loaded letter-size photo
paper, choose US Letter (Borderless).
Troubleshooting
124


