


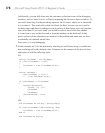


186 Microsoft Visual Studio 2010: A Beginner’s Guide
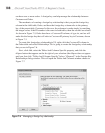
The CustomerID has a primary key symbol, which is created by right-clicking the
column and selecting Set Primary Key. If you needed a composite key (multiple columns
that define a key), which you don’t in this simple example, you would press
CTRL and click
each column that belongs to the key and then right-click and select Set Primary Key.
NOTE
When working with LINQ, which we discuss later in this chapter, it is absolutely
essential that you give every table a primary key.
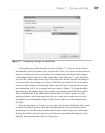
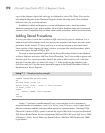
In addition to setting the primary key, it’s helpful to make the key number auto-
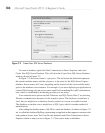
increment so that it will have a unique value for every record you insert. In Figure 7-3,
you can see that CustomerID is selected and Column Properties has scrolled down to the
Identity Specification property. By default, Identity Specification is collapsed and set to
No. You’ll need to expand the Identity Specification property by selecting the arrow on
the left, and change the value to Yes by selecting the drop-down arrow on the right of the
“(Is Identity)” setting, which by default is No. This will also enable Identity Increment,
which specifies the number to add for each new record, and the Identity Seed, which
specifies what the first number will be. The effect of setting Identity Increment is that the
first record added to the table will have a CustomerID with the value 1 (Identity Seed) and
subsequent records will have a CustomerID with the values 2, 3, 4, and so on (Identity
Increment). The value for CustomerID in each record creates a unique value that identifies
the record and makes it easy to program data applications.
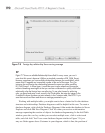
When you’re done creating the table, click the Save button on the toolbar and name
the table Customer when prompted.
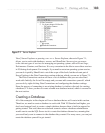
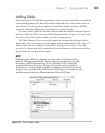
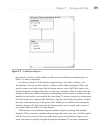
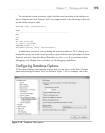
You can add data to the Customer table by opening the database in Server Explorer,
navigate to the Tables folder in the MyShop database, right-click Customer, and select
Show Table Data. You’ll see a grid similar to Figure 7-4 where you can enter some
Figure 7-4 Adding data to a table