


Chapter 11: Deploying Web Services with WCF 325
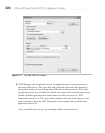
With the user account set up for the database, update the app.config file of the service
to use the credentials of that user account, like this. For best security, please remember to
change the password:
<add name=
"WcfDemoCS.Properties.Settings.MyShopConnectionString"
connectionString=
"Data Source=.\sqlexpress;Initial Catalog=MyShop;
User ID=MyUserAccount;Password=G7b@H8m2a%lM6y;Pooling=False"
providerName="System.Data.SqlClient" />
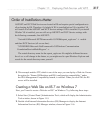
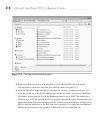
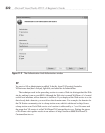
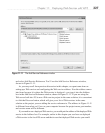
To deploy, right-click the Web Services project, WcfDemo, and click Publish, which
will display the Publish WCF Service window shown in Figure 11-10.
In the Publish WCF Service window, set the Target Location to the address where the
WCF Service is deployed. You saw how to figure out the address earlier in this section.
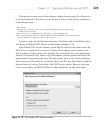
You can choose to either replace only matching files or delete all files in the deployment
location. You normally only want to copy files needed to run this application because the
deployment will be quicker with fewer files and possibly more secure by only deploying
what is necessary. The check box for Include Files From The App_Data Folder is disabled
because there isn’t an App_Data folder in the WCF Service project. However, this same
tool is used to deploy an ASP.NET Web site, which might have an App_Data folder.
Figure 11-10 The Publish WCF Service window