


324 Microsoft Visual Studio 2010: A Beginner’s Guide
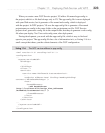
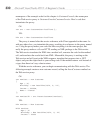
Following the path in Listing 11-6—configuration, system.serviceModel, services,
service, host, and baseAddresses—you’ll find a baseAddress element in bold. The
baseAddress in Listing 11-6 is split into two lines to fit the book, but remember to combine
it into a single line. The baseAddress is declaring that applications can communicate
with this service via this address. This is a VS development Web server address that
was generated for this WCF service. Previously, you saw how we figured out what the
deployment address of this application should be. Therefore, when you deploy, comment
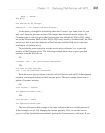
out the development address and replace it with the deployment address, like this:
<baseAddresses>
<!--<add baseAddress=
"http://localhost:8732/Design_Time_Addresses/WcfDemoCS/Service1/" />-->
<add baseAddress=" http://localhost:8080/WcfDemoCS.CustomerService
.svc " />
</baseAddresses>
The <!-- and --> are comment delimiters, and anything in between them won’t be
interpreted as part of the configuration. Notice how the deployment address is used
(uncommented) as the base address. After deployment, you can comment the deployment
address and uncomment the development address so that you can continue working with
the WCF service with the VS Web server.
In addition to the baseAddress, you need to ensure your database connection is
updated for the deployment environment. In the development environment, the default
DB connection string defaults to using Integrated Security = true as login credentials,
which uses the identity of the currently logged-in user. The result in the deployment
environment is that the application will run as the identity of the application pool the
Web site is assigned to. The problem with this is that the application pool doesn’t have
access to your database. The best approach is to create a user for your application only,
give that user access to your database, and then set the connection string to use the
credentials of that user.
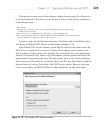
Create a user in your Windows OS that will be used for SQL Server and then give
that user access to the database. If you’re using an Express version of SQL Server
, it can
help if you download the free SQL Server Express Management Studio. Because of all the
variables that can affect setting up security, refer to SQL Server documentation for more
guidance. This chapter uses SQL authentication, so go ahead and create a Windows or
SQL user for the MyShop database.