234 Microsoft Visual Studio 2010: A Beginner’s Guide
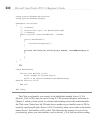
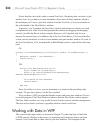
Notice that the class in this code is named NewOrder, illustrating that a window is just
another class. As you know, you can instantiate classes and call their methods, which is
the technique you’ll use to open this window from the NewOrder_Click event handler in
the code-behind of the MainWindow window.
In practice, you’ll populate the NewOrder window with whatever controls you need
to implement a new order. You would populate the window by dragging and dropping
controls, just like the Button in this example. However, we’ll skip that task for now
because the current focus is on adding code to the NewOrderButton_Click event handler
so that you can learn how to code an event handler and open another window. Go back to
the NewOrderButton_Click event handler in MainWindow.xaml.cs and add the following
code:
C#:
private void NewOrderButton_Click(object sender, RoutedEventArgs e)
{
NewOrder newOrd = new NewOrder();
newOrd.Show();
}
VB:
Private Sub NewOrderButton_Click(
ByVal sender As System.Object,
ByVal e As System.Windows.RoutedEventArgs)
Handles NewOrderButton.Click
Dim newOrd As New NewOrder
newOrd.Show()
End Sub
Since NewOrder is a class, you can instantiate it as shown in the preceding code
example. To open the window, call the Show method.
Now you have a WPF program that handles events and opens new windows. Press
F5
to run the program. Click New Order and observe that the New Order window appears.
The New Order window isn’t very useful because it lacks controls and data management.
The next section shows you how to populate window controls with data.
Working with Data in WPF
This section builds upon what you learned in Chapter 7 by showing how to bind data
to WPF controls. Binding is the process of populating and retrieving data to and from
controls. You’ll learn how to show data in your user interface. The examples in the


