


308 Microsoft Visual Studio 2010: A Beginner’s Guide
Using a custom type for the purpose of lookup controls at the UI level, such as
the CustomerLookup class in Listing 11-3, opens the potential to only communicate
information that is necessary, rather than an entire object where all of the data isn’t being
used. Considering the potential slowness of network communication, limiting the amount
of information transmitted between the Web service and your application can increase the
performance of your application.
Now that you have a contract in place, the next step is writing a class that implements
that contract.
Implementing Logic with WCF Classes
The contract created in the preceding section was important because it specifies what must
be implemented. As you know, interfaces only specify members, which are the contract,
but you must write a class that contains code that implements the interface. This section
will implement the ICustomerService interface with a class named CustomerService.
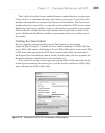
The first thing you should do is rename the Service1.cs (Service1.vb in VB) file to
CustomerService.cs (CustomerService.vb in VB) and click Yes when VS asks if you
want to change the code. Listing 11-4 shows what VS generates as a WCF service class,
with the rename applied to the class.
Listing 11-4 Default WCF service implementation class
C#:
using System;
using System.Collections.Generic;
using System.Linq;
using System.Runtime.Serialization;
using System.ServiceModel;
using System.Text;
namespace WcfDemoCS
{
// NOTE: You can use the "Rename" command on the
// "Refactor" menu to change the class name "Service1"
// in both code and config file together.
public class CustomerService : ICustomerService
{
public string GetData(int value)
{
return string.Format("You entered: {0}", value);
}