


Chapter 7: Working with Data 203
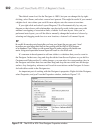
LINQ to SQL generates a lot of code for you, and the Properties window allows you to
modify parts of that code through the Code Generation section. To see this section, be sure
your Properties window has the “Categorized” button selected near the top left side, and
not the Alphabetical “AZ” button. You can also see the database connection string, which
is created when you dragged and dropped from Server Explorer to the Designer and saved.
In addition to properties for the Designer itself, you view properties on objects such
as classes, associations, and methods. Select the object you want to work with, right-click
that object, and select Properties to show the Properties window for that object.
You now have a data model to work with. The following sections show you how to
work with this data model to query, insert, update, and delete data.
Introduction to Querying LINQ to SQL
Previously, you learned how to use LINQ through the LINQ to Objects provider. All of
what you learned with LINQ to Objects is applicable to other LINQ providers, including
LINQ to SQL. This section combines the nuances of LINQ to SQL with what you’ve
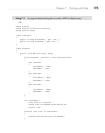
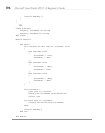
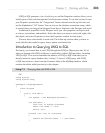
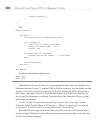
already learned to query database data. Listing 7-3 shows a LINQ query with LINQ
to SQL that retrieves values from the Customer table of the MyShop database, which
contains the tables added previously in this chapter.
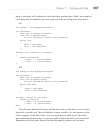
Listing 7-3 Querying data with LINQ to SQL
C#:
using System;
using System.Linq;
namespace LinqToSqlDemoCS
{
class Program
{
static void Main()
{
var myShop = new MyShopDataContext();
var customers =
from cust in myShop.Customers
where cust.Name != "Joe"
select cust;
foreach (var cust in customers)
{
Console.WriteLine("Name: " + cust.Name);
}