220 Microsoft Visual Studio 2010: A Beginner’s Guide
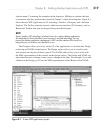
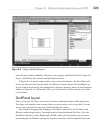
Similarly, if you add a TextBox element to the XAML, you’ll see the visual representation
of that TextBox in Design.
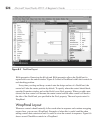
You have various controls for manipulating the windows. Both Design and XAML
have zoom controls. The zoom tool on Design is a slider in the upper-left corner, and
zoom for XAML is a drop-down control in the lower-left corner. You can also zoom by
clicking either Design or XAML and moving the mouse wheel. At the upper right of the
XAML editor (bottom right of the Design surface), you can switch between horizontal and
vertical splits of the window or click the chevron to collapse the XML. The splitter icon
below the chevron allows you to split the XAML editor into two if you drag it down. The
up-down arrow between the Design and XAML tabs allows you to switch sides so that
each panel shows where the other was. Locating the carat in the middle of the separator
between Design and XAML allows you to resize each window.
Understanding Layout
A layout defines how you can position and size controls on a screen. WPF windows and
controls have a Content (can occasionally be called something else) property that accepts
a single control. In some cases, such as a Button control, the content can be text. However,
many situations call for the ability to lay out multiple controls. This section concentrates
on performing layout in windows, and a Window has a Content property that accepts
only one control; that one control should be a layout control, which is the subject of this
section.
WPF includes several layout controls, including Grid, StackPanel, DockPanel,
WrapPanel, and Canvas. By default, VS will generate a window with a Grid as the layout
control. However, you are free to replace the Grid with any other layout control that suits
your needs. This section will show you how to use each of these controls.
Grid Layout
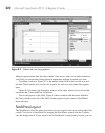
Whenever starting a new WPF project, VS adds a Grid. A Grid is a layout control that
allows you to create a set of rows and columns that hold other controls. Y
ou can add rows
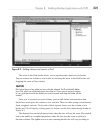
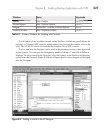
and columns to a Grid through the Visual Designer by clicking in the middle of a window
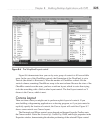
in design view. Figure 8-2 shows a column being added to a Grid.
The thin vertical line in the middle of the window is a new border between two columns.
After clicking the window, you’ll see two thick borders on the left and top of the window.
While you hover over the top border, VS draws a vertical line that moves left and right as
you run your mouse along the top border. You can do the same with the left border, adding
rows to the Grid. This is a very quick way to add rows and columns to a Grid.


