


Chapter 12: Customizing the Development Environment 355
<Literal>
<ID>max</ID>
<Default>length</Default>
<ToolTip>Max length</ToolTip>
</Literal>
</Declarations>
<Code Language="csharp"><![CDATA[for (int $index$ = 0;
$index$ < $max$; $index$++)
{
$selected$ $end$
}]]>
</Code>
</Snippet>
</CodeSnippet>
</CodeSnippets>
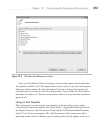
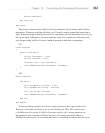
As shown in Listing 12-1, a snippet is an XML file where all data is defined by begin
and end tags arranged in a hierarchy. Inside of the CodeSnippet tags are Header and
Snippet elements.
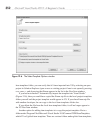
Inside of the Header element is a Shortcut element that defines the prefix you must
type in the VS editor to use the snippet. The Title and Description tags define what displays
for Intellisense in VS when the shortcut is being typed. Author tells who wrote the snippet.
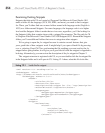
The SnippetTypes element defines the two ways to use a snippet: Expansion and
SurroundsWith. Chapter 2 describes many snippets that work via Expansion. However,
SurroundsWith snippets are also very useful. To use a SurroundsWith snippet, highlight the
code that you want to surround, press
CTRL-SPACE, and select the snippet. After selecting
the snippet, the snippet template will appear in VS, with its blocks surrounding the
highlighted text. Since the for loop has a block that can contain statements, it makes sense
that the for snippet is both a SurroundsWith and Expansion snippet.
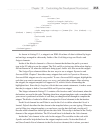
The Snippet element in Listing 12-1 contains a Declarations and Code element, where the
declarations are used in the code. Thinking about how snippet templates work, remember that
your cursor is positioned on blocks of code that you change and tab through to complete the
snippet. The blocks of code to be filled in correspond to Literal elements in the declaration.
Each Literal element has an ID that is used in the Code to define where the Literal is
located. Default describes the data shown in the template before you start typing. Whenever
you’re filling in a snippet template, you can hover over the data field and a tooltip will
describe what information should go into the data field. This tooltip is defined in the Tooltip
element of the snippet definition. The ID of each literal is defined in the Code element.
Inside the Code element is the code for the snippet. The variables in the code with
$ prefix and suffix help define how the snippet template works. Notice that $index$
and $max$ match Literal elements in the Declarations element; this is where you must