


Chapter 3 Removal and Replacement Procedures
3-125
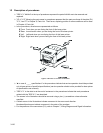
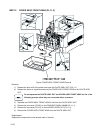
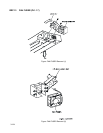
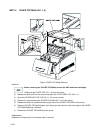
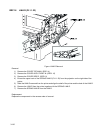
Removal
1) Remove the COVER ASSY FRONT HEAD. (RRP1.2)
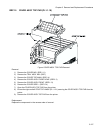
2) Remove 2 screws securing the HOLDER LEVER OUT (PL1.1.4) from the rear of the COVER ASSY
FRONT HEAD.
3) Remove the HOLDER LEVER OUT (PL1.1.4) from the COVER ASSY FRONT HEAD together with the
FAN FUSER, LEVER OUT (PL1.1.5).
4) Remove the LEVER OUT from the HOLDER LEVER OUT.
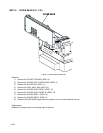
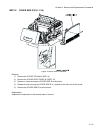
5) Remove the connector (P/J137) of the FAN FUSER.
Take note and remember how the wire harness is routed because the new wiring
harness must be routed in the same way.
6) Release the hooks securing the FAN FUSER at 4 positions to the HOLDER LEVER OUT.
7) Remove the FAN FUSER from the HOLDER LEVER OUT.
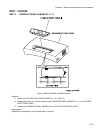
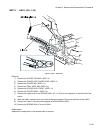
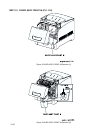
Replacement
Replace the components in the reverse order of removal.
When mounting the FAN FUSER on the HOLDER LEVER OUT, route the wire harness
in the same way that the removed fan’s harness was routed.