3-236
Removal
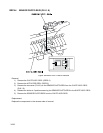
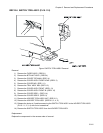
When removing the HOLDER TCRU ASSY UNIT, remove the toner deposit on the
HOLDER TCRU ASSY with a vacuum cleaner or the like before starting its removal
process.
When removing the toner deposit on the HOLDER TCRU ASSY with a vacuum cleaner,
attach an earth code to the end of the cleaner to escape the static electricity.
When removing the toner deposit on the HOLDER TCRU ASSY, be careful not to allow
the toner to fly to the sensors on the HOLDER TCRU ASSY by the static electricity.
Do not touch the sensor face.
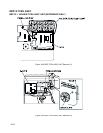
1) Remove the FUSER ASSY. (RRP8.1)
2) Remove the BTR UNIT ASSY. (RRP8.4)
3) Remove the COVER TOP MAIN. (RRP1.4)
4) Remove the COVER ASSY FRONT HEAD. (RRP1.2)
5) Remove the COVER MSI. (RRP1.11)
6) Remove the TRAY ASSY MSI. (RRP1.12)
7) Remove the COVER ASSY FRONT. (RRP1.13)
8) Remove the COVER ASSY FRONT IN. (RRP1.10)
9) Remove the COVER SIDE L. (RRP1.14)
10) Remove the COVER SIDE R. (RRP1.9)
11) Remove the COVER REAR. (RRP1.6)
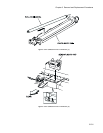
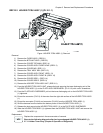
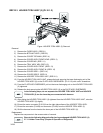
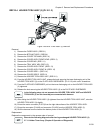
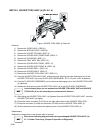
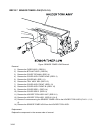
12) Remove the connector (P/J166) of FAN REAR (PL12.1.2) on the LVPS STD (PL12.1.10) from the right
side surface of the printer.
13) Shift the harness (P/J166) of the FAN REAR from the hook of the HOLDER TCRU ASSY (PL10.1.1, 2,
3, 4) on the right side surface of the printer.
14) Remove the connector (P/J51) on the PWBA HNB DRV (PL12.1.12) from the right side surface of the
printer.
15) Remove the connector (P/J144) on the PWBA EFPROM STD (PL10.1.16) on the left side surface of
the printer.
16) Remove the connector (P/J5020), connector (P/J5030), and connector (P/J5011) on the S-HVPS
(PL10.1.17) on the left side surface of the printer.
17) From the printer, release the harness of the connector (P/J5011) from the clamp.
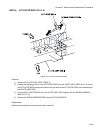
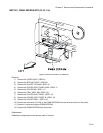
18) Release the hooks at 2 positions securing the GEAR SLIDE to the left side surface of the printer.
19) Remove the GEAR SLIDE from the printer.
20) Remove the RACK V from the printer.
21) Remove 8 screws securing the HOLDER TCRU ASSY UNIT to the printer.
22) Remove the HOLDER TCRU ASSY UNIT from the printer.
Replacement
Replace the components in the reverse order of removal.
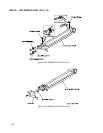
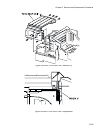
In replacing the GEAR SLIDE, meet the leading edge of gear rail on the left side with
the vertex of a triangle mark on the RACK V.


