


3-206
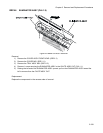
RRP6.11 ACTUATOR MSI (PL6.1.37)
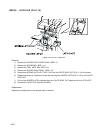
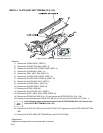
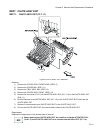
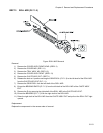
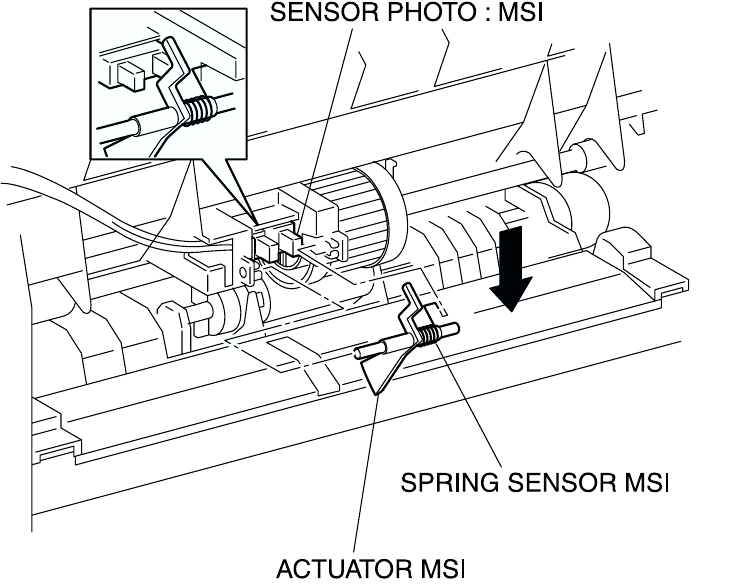
Figure: ACTUATOR MSI Removal
Removal
1) Remove the COVER ASSY FRONT HEAD. (RRP1.2)
2) Remove the COVER MSI. (RRP1.11)
3) Remove the TRAY ASSY MSI. (RRP1.12)
4) Remove the COVER ASSY FRONT. (RRP1.13)
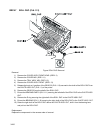
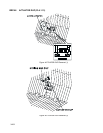
5) Pushing down the PLATE BOTTOM MSI on the CHUTE ASSY OUT (PL6.1.1) from the printer, push
the actuator of the ACTUATOR MSI inward.
6) Slide the ACTUATOR MSI leftward from the CHUTE ASSY OUI and extract the shaft on the right side
of the ACTUATOR MSI.
7) Move the right shaft of the ACTUATOR MSI frontward from the CHUTE ASSY OUT and extract the
ACTUATOR MSI together with the SPRING SENSOR MSI (PL6.1.36).
8) Remove the SPRING SENSOR MSI from the ACTUATOR MSI.
Replacement
Replace the components in the reverse order of removal.